
If you have a molded laminate countertop then a full tile should start at the top of the integral backsplash provided by the countertop as shown in Figure 6.
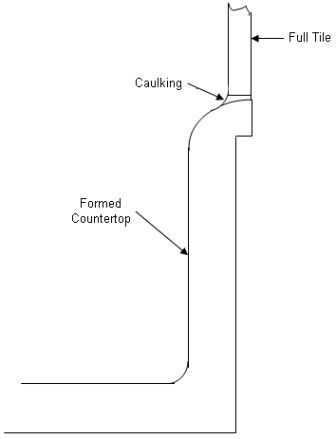
Figure 6 - Position of starting tile with integral laminate countertop backsplash
Cut tiles should be on the top row and vertical edges.
When doing your layout do not forget to allow for grout space. The standard spacing for grout on a backsplash is 1/8 inch, although some people use 3/16 inch.
Many backsplash tiles will have grout spacing tabs molded into the edge of the tile.
If there are no tabs on the tiles it is wise to use plastic tile spacers, as shown in Figure 7, to maintain horizontal and vertical spacing while you are installing the tile.
Figure 7 - Tile spacer
Tiles laid on a vertical surface have a tendency to slide downwards until the adhesive has set. Tile spacers prevent this from occurring.
Note: When doing your layout it is important to measure the actual tile you are using. As an example a 4 inch tile may be 3 7/8″. Many tiles produced overseas are molded in metric and boxed in imperial measurements. The size on the box or package should not be considered the exact
size of the tile.
Before starting your first row, place a level
Continued...
on the countertop and make sure that it is level. If an adjustment is needed, make the adjustment on the first row by raising the start tile to level.Note: Use at least a 36″ level a 48″ would be better. The longer the level the more accurate the reading.
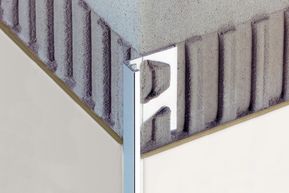
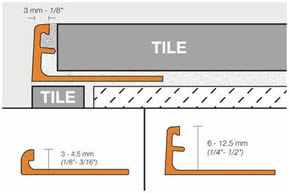
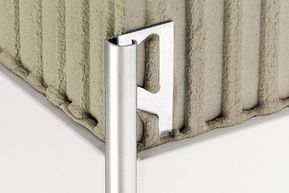
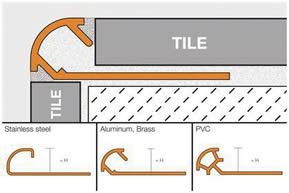
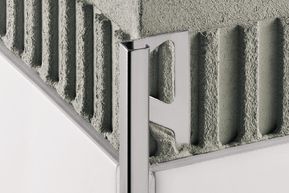
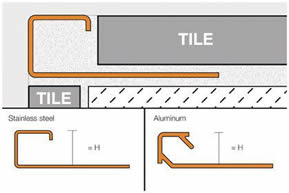
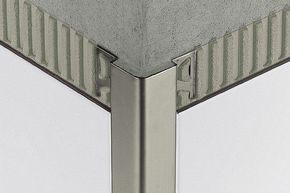
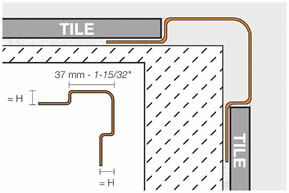
Consider how you will finish outside edges, if there are any in your layout. Some tiles have an outside edge tile, other alternatives include, bullnose tile (if available in that style, as shown in Figure 8, metal and vinyl trim edging, as shown in Table 1. Start outside edges at the edge and work towards the back wall.
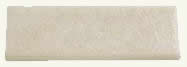
Figure 8 - Bullnose tile
If possible tile behind exhaust fans, this will allow for easy removal for repair or replacement.
- Prior to installing any tiles, remove switch and receptacle plates. Remove the mounting screws from switches and receptacles. Switches and receptacles must be mounted on top of the tile.
- Apply adhesive using a notched trowel. The notches in the trowel should be the same as the thickness of the tile. It is not necessary to apply adhesive to the entire wall in one step. Apply adhesive to approximately 2 to 3 square feet of wall and install tiles, then continue on.
- Cutting tiles is somewhat dependent on the material you are using. Ceramic tile is cut in the same manner as glass, by scratching the surface and breaking off the piece at the scratch line. Manual tile cutters (Figure 9) work very well with wall tile.
Note: Now is the time to do any electrical modifications, such as adding receptacles or moving switches.

Figure 9 - Manual ceramic tile cutter
If you are using porcelain or natural stone tiles, you will need to use a wet saw, as shown in Figure 10, to cut those tiles. A wet saw also has the advantage that you can cut notches and corners from tile, which is advantageous when tiling around cabinetry and electrical boxes. You can not make notches or cut corners with a manual tile cutter.
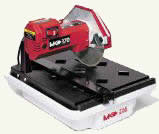
Figure 10 - Wet saw
- Once all the tiles are installed, wait 24 hours to allow the adhesive to dry prior to grouting. Apply grout between all tiles. Where tiles meet up with countertops or cabinets consider finishing those areas with a caulking
- Backsplashes as their name implies protect the walls from splatters when cooking. Because a backsplash may be subjected to numerous foods, greases and oils it is wise to use a grout sealer to protect the grout from stains. For best results use a high quality
penetrating
sealer.