

Figure 1 - Bathroom exhaust fan
Installing a bathroom exhaust fan can greatly reduce damaged caused by excess moisture generated by showers and steam units.
Most building codes require the installation of an exhaust fan in any bathroom that does not have a window that opens.
The installation of a bathroom exhaust fan is not difficult although there can be logistic challenges to overcome.
Installing Electrical Power For The Exhaust Fan:
Additional information on electricity.
If you are replacing a light fixture with a combination exhaust fan/light fixture the wiring is straight forward. The wires that connected to the light fixture that is in place can be used to power the new combination exhaust fan/light fixture. In this case the current switch when placed in the ON
position will power the exhaust fan and the light.
To operate the light independent of the exhaust fan it will be necessary to add a switch and wires from the exhaust fan to the switch location. A dual switch can be used in a single junction box, replacing the single switch currently installed, this makes the installation simpler as there is no need to add an electrical box, however a wire still must be run from the switch to the exhaust fan/light fixture combo.
Exhaust fans with integral heaters and lights may require a triple switch, as shown in Figure 2, and/or a combination of switches and timers. Many manufacturer's include timers, if required, as part of the exhaust fan package. Units with heaters may require an additional circuit if the wattage is greater than the available power.
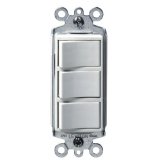
Figure 2 - Triple switch
Installing Your New Exhaust Fan
Shut off the power to the electrical circuit by turning the breaker OFF
or removing the fuse.
If you are replacing an existing light fixture with a combo exhaust fan/light fixture. Remove the current light fixture. The electrical box for the light fixture will be removed and the wiring will be connected in the electrical box that is integral with the housing.
Cut the hole in the ceiling or wall based on the manufacturers opening requirements. If the ceiling is in attic space, remove any insulation from around the exhaust fan, at least 3 inches in all directions (follow the manufacturer's recommendations). If the location is not next to a ceiling joist provide additional wood blocking in order to have a frame to mount the exhaust fan housing.
If required run your additional wiring from the switch electrical box location to the exhaust fan housing. Combo units can be wired using a common neutral wire (unless the manufacturer's instructions say otherwise).
The unit must be vented to the outside. The most common venting is to use a piece of flexible duct through a wall or soffit. It is not generally advisable to vent through the roof although in some circumstances there is no alternative. The shortest route is always the best and the less turns in the duct work the more air that will be exhausted.