
The joints of the front cabinet face-frame should be put together with dowels (Figure 5c), mortise and tenon joints (Figure 5d), biscuits (Figure 5e) or lap joints (Figure 5f) and yellow carpenters glue. It should be noted that dowel and mortise and tenon joints do not have to be clamped while the glue is setting. However, lap joints must be clamped and the glue must be set before any additional work can be done to the face frame.

Figure 5b - Construction of the face-frame
Additional information on using dowel joinery.
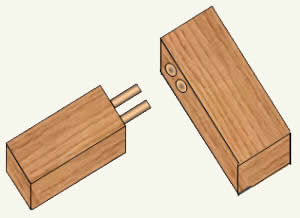
Figure 5c - Dowel joint construction
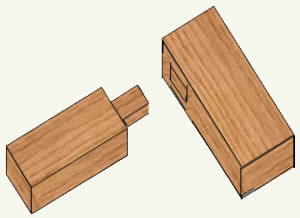
Figure 5d - Mortise & Tenon joint construction
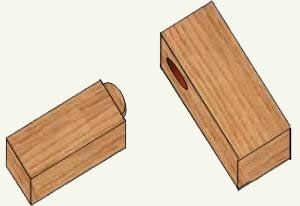
Figure 5e - Biscuit joint construction
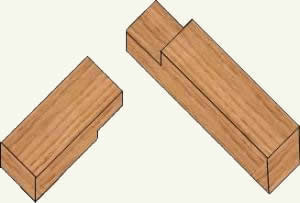
Figure 5f - Lap joint construction
The lap joint, can be strengthened by inserting dowel pins through the joint, as shown in Figure 5g.

Figure 5g - Using dowels to strengthen a lap
They can be inserted through the front, which will provide a decorative element to the cabinets, or they can be inserted through the back, in a blind hole so that they are not visible on the front face of the cabinet face-frame.
Secondarily, dowels or dowel and buttons plugs (Figure 5h) can be used to cover blind screws, or used as decorative elements for any style of joinery.
Figure 5h - Button plugs
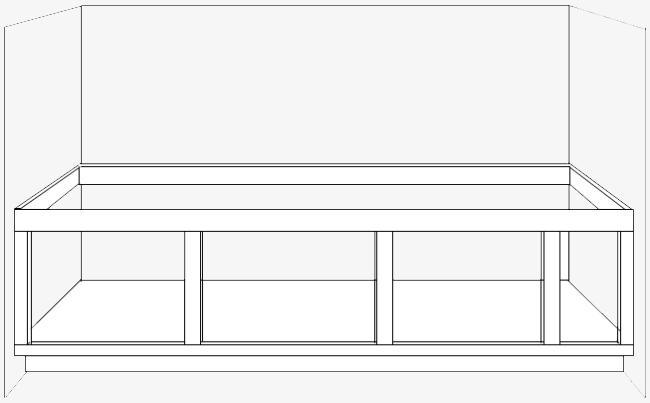
The face-frame should be attached to the front edge of the cabinet floor and the edges of the uprights using dowels and carpenters glue. The finished face-frame for a very basic cabinet would look similar to Figure 6.
Figure 6 - Base cabinet with face-frame attached
The specific width dimensions of the uprights and cross members can be adjusted for the sizes of doors to be purchased or made.
- Uprights that rest against a wall should be at least 1 1/2″ wide to allow for the door to open without damaging the adjacent wall.
- The bottom of the face-frame is usually no more than 1″ and the top of that member should be flush with the top of the cabinet base floor.
- The top member is usually about 2″ wide.
More complex front configurations generally include drawers. Remember, that if a sink is going to be installed in the countertop of this base cabinet, you can not have drawers directly under the sink. In many cases for aesthetics, false drawer fronts are installed.
Figure 7 shows a cabinet configuration using drawers above the cabinet doors.
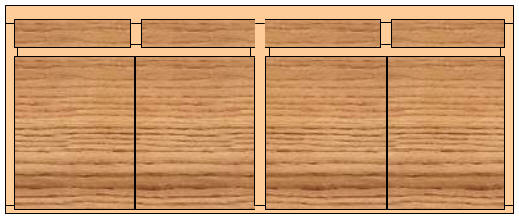
Figure 7 - Base cabinet configuration with drawers above cabinet doors
Figure 7a shows the front face-frame configuration for that layout.
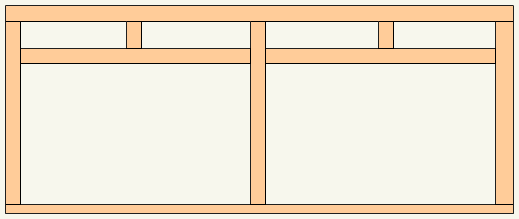
Figure 7b - Cabinet face-frame construction for drawers above cabinet doors
Continued - Base Cabinets...
Also see: