
- Butyl Rubber Caulk:
This product has excellent thermal expansion characteristics and because of that works extremely well in outdoor environments where large temperature changes are common. The material can be used on most porous and non-porous surfaces such as metal, concrete and wood. Some manufacturers will identify the product as a foundation, gutter, or roof caulk. Clean up is with the use of solvents.
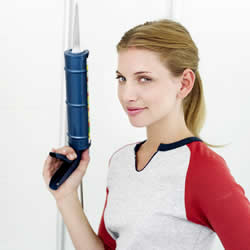
Figure 1 - Caulking gun with squeeze tube
- Butyl Rubber & Asphalt Caulk:
- Adhesive Caulk:
- Concrete & Mortar Caulk:
Primarily used for roof repair especially around chimney and vent pipe flashings and skylights. Clean up is with solvents.
Most caulk has an adhesive quality to it. However, some caulk is specifically formulated to act as an adhesive. An adhesive caulk is often used to inset bathroom fixtures such as soap dishes, seal sink rims and to mount counter tops to cabinetry. Adhesive caulk has less flexibility than other caulk.
Used to seal cracks in mortar and concrete, this product is formulated to adhere to masonry. It is usually a latex based product and cleans up with damp rag.
Packaging
The most common caulk packaging is in tubes that require the use of a caulk gun, as shown in Figure 1. Some caulk, especially caulk for roofing, is available in bulk in cans and is designed to be used in a refillable caulk gun. Some of the specialty caulk such as bath and tub caulk is available in squeeze tubes.
Proper Caulk Methodology:
Most people shy away from doing their own caulk because it can be messy if you have not mastered a technique. However, it is like driving a car, once you have developed the technique you will be able to apply caulk without even thinking about the individual steps.
As with many projects, the right tools are necessary to do a quality job. In the case of caulk a good caulk gun, and learning how to properly cut the tip are two of the keys to success. An experienced caulker can form a perfect bead without ever using their fingers to smooth it over. That takes a lot of experience and most home handymen do not caulk enough to get to that skill level.
Putting Caulk To Work:
- Make sure that the surfaces of the crack are clean and free from dirt or other foreign objects such as paint chips or pieces or mortar. Caulk will not adhere to dirt. If you are caulking an area that was previously caulked, remove all of the old caulk before you apply the new caulk. In general, caulk does not adhere well to other caulking.
- Caulk will work for most cracks up to 1/2 inch. If the crack or hole is wider than that, you should consider using an expanding foam product. Do not attempt to fill the hole with multiple layers of caulk.
- The better the caulk, the longer it will last. High quality elastomeric caulk can last for more than 20 years.
- Caulk will run from the tip of the tube if you do not release the trigger the instant you have completed a bead.
- Keep a rag (a cloth rag is preferable) or paper towels with you at all times. Discard any rags that you have used on completion of the project.
- The more you caulk, the better you will become at creating consistent beads. If you have not applied caulk previously or if you are rusty, take a couple of boards, nail them together and practice creating beads. Most people master a straight horizontal or vertical bead quite quickly; it is corners, turns and where horizontal beads meet up with vertical beads that cause the most problems. A tube of latex caulk is inexpensive and it is well worth the time practicing on scrap lumber before you undertake your project.