
This means that if you place shelves in the exact center of the closet they may be difficult to access, as shown in Figure 12.
With sliding closet doors it would be best to place shelving on the left or right side of the closet in order to have unobstructed access.
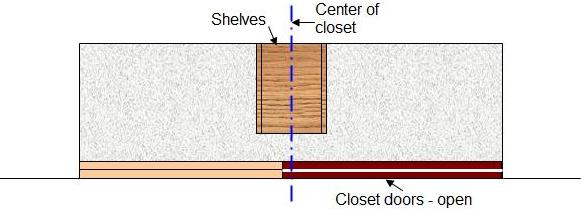
Figure 12 - Sliding closet doors
If however you have bi-fold closet doors the placement of the shelving in the middle of the closet may be the best position for unobstructed access, as shown in Figure 13.
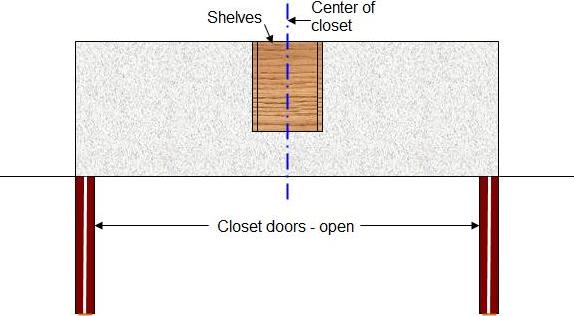
Figure 13 - Bi-fold closet doors
Figures 14 and 15 show some additional closet organizer configurations. All of the designs are relatively inexpensive and should not take more than a few hours to put build and install them.
Figure 14 shows a closet organizer using the bottom of the entire closet as shelving.

Figure 14 - Closet organizer - bottom shelving
Figure 15 utilizes a shelving unit in the center of the closet and additional shelving below the single closet rod.
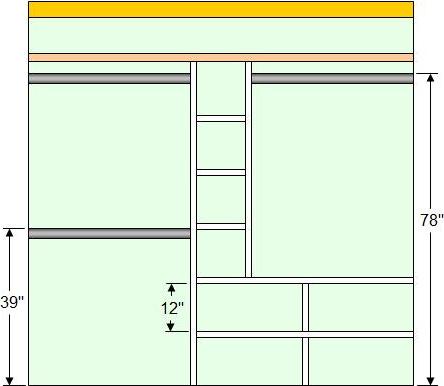
Figure 15 - Closet organizer - center and bottom shelving
The configuration of your closet organizer, the closet rods and shelving, is only limited by your imagination.
Note: If you are building shelves that go wall to wall, always measure at the inside and outside points of the shelf and at the height of the shelf from the floor. Interior walls are not truly straight and walls are not at true 90 degree angles. Remember the old adage. Measure twice and cut once!