
Tile flooring can be beautiful, it highlights almost any room and provides an elegance that few other materials can provide. However, one crack in one tile, as shown in Figure 1, and the aesthetic value of the flooring is ruined. Ceramic, porcelain, marble and granite are striking products with one common problem - they do not flex in any manner, hence they can crack relatively easily.
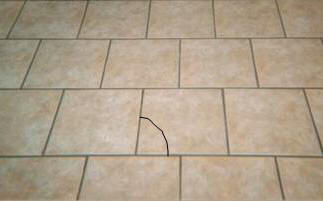
Figure 1 - Cracked Ceramic Flooring Tile
If you have a spare flooring tiles, you can remove the cracked tile and replace it with a new one. Replacing a cracked flooring tile is a home improvement project that most diy home handymen should be capable of accomplishing.
The primary key to a successful flooring tile replacement is Patience
!
Follow these simple steps and your flooring will look like new.
Before starting on the replacement, there are a few do not's!
Do Not!
- Do not attempt to remove the flooring tile before you remove the grout that surrounds the flooring tile. Many articles and help tips will tell you to remove the flooring tile and then the grout, although this may work 50% of the time, the other 50% of the time you will end up with broken flooring tiles adjacent to the flooring tile that was originally broken.
- Do not use a pry-bar, chisel or putty knife or other tool under the grout edge of the broken flooring tile as shown in Figure 2. When you apply leverage to the tool you will most likely be applying a great deal of pressure to the edge of a good flooring tile, which is a sure fire way to break or chip another flooring tile.
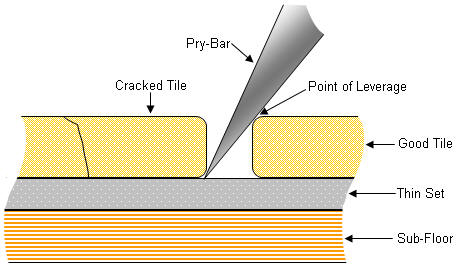
Figure 2 - Do not use a tool to pry up the broken tile!
- Do not use wood chisels, unless you don't care about destroying the edge of your chisel!
Safety Tip:
Ceramic and porcelain flooring tile is not unlike glass when it shatters. Small fragments can be razor sharp. Always wear safety glasses when chipping out a ceramic, porcelain or other natural stone flooring tile.
Tile Replacement Procedure:
- Remove the grout from between the good flooring tiles and the cracked flooring tile. There are some special tools made for this process or you can use a small edge, electric diamond grinding tool.
- Once all of the grout is removed, you can start on the flooring tile removal.
- Once the tile is removed you must remove any thin set (flooring adhesive or mortar) that remains on the floor. This procedure usually takes an electric grinder, although if the sub flooring was not clean when the thin set was originally installed you may be able to remove it with a cold chisel.
- With a clean floor, you can install the new flooring tile, allow 24 hours for the thin set or flooring adhesive to cure and then apply the new grout.
Common Grout Removal Tools
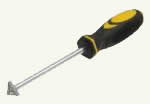
Hand tool with carbide tips
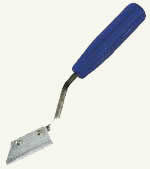
Hand tool with diamond cutter
Powered tool with cutter bits
Selection of grout removal tools.
Hitting the cracked flooring tile with a hammer is not recommended as this will cause small fragments of the tile to fly across the room, as well, the vibration from the impact could easily damage other flooring tile.
The best procedure is to drill some holes, in a straight line, in the center and across the broken flooring tile. The number of holes is relative to the size of the flooring tile. Usually a hole for every 2 to 3 inches of flooring tile is sufficient. Use a 1/4 inch carbide or diamond tipped drill bit< and some water or cutting oil to keep the drill bit cool.
Use a cold chisel set in the center of the holes and with the tip running parallel to the holes, hit it with a hammer. This should create a crack running the full length of the flooring tile
Using the cold chisel on the crack that has been created, placed at about a 60 degree angle, drive the tip into the crack, this should do one of two things. Lift that complete section of tile or break off a piece of the broken flooring tile. In either case work with the new edge that was created with the cold chisel and remove the rest of the damaged flooring tile.