
- Tools
There are specific tools designed to spread drywall compound. These tools generally fall under the heading of drywall knives. It should be noted that most professionals do not use drywall knives they use a drywall trowel, as shown in Figure 5.
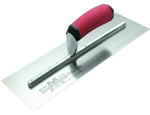
Figure 5 - Drywall trowel
The home handyman should use drywall knives rather than a drywall trowel as it takes a lot more experience to use the trowel. Drywall knives come in an assortment of sizes and materials. If you are doing a reasonable size area you should consider using stainless steel drywall knives, as shown in Figure 6. They are easy to clean and have the required flexibility to create a professional job. I recommend having two sizes, a 6 inch, as shown in Figure 6, and a 12 inch.
If you have a lot of inside corners to tape you may want to consider purchasing a drywall corner trowel, as shown in Figure 7. A corner trowel does make the project go quicker as you cannot apply compound to both sides of an inside corner at the same time if you are using a drywall knife, you have to apply the drywall compound to one side and let it dry and then do the other side.
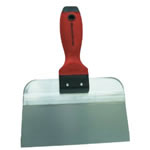
Figure 6 - Drywall knife
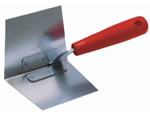
Figure 7 - Drywall inside corner trowel
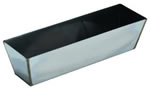
Figure 8 - Drywall mud tray or pan
They do make outside corner trowels, but I think they are a waste of money. There is no problem in applying joint compound to both sides of an outside corner at the same time when taping.
Note: One problem with metal drywall knives is that the corners are extremely sharp and this can cause tears in the tape when taping inside corners. If you do not purchase an inside corner trowel I highly recommend that you grind the sharp corner edges off of the drywall knife before you use it.
I also recommend that you purchase a drywall mud pan or tray, as shown in Figure 8, as this allows you to work continuously without having to make frequent trips back to the drywall compound pail. If you would prefer you can use a drywall mud hawk, as shown in Figure 9, to hold the drywall compound while you are taping.
Note: I prefer to use a drywall mud pan or tray as I find, it difficult to rest the hawk, especially when I am on a ladder.
At some point you will have to sand the drywall. There are all sorts of drywall sanders available and many of the new designs have vacuum attachments. Personally I use a hand sander, as shown in Figure 10, and a pole sander, as shown in Figure 11, both without the vacuum attachment as I find the vacuum cleaner hose prevents me from doing a smooth sanding, but I am old school, and if you can deal with the vacuum hose, it does help to keep the dust down.
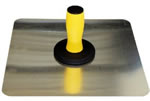
Figure 9 - Drywall mud hawk
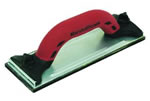
Figure 10 - Drywall hand sander
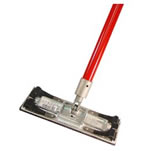
Figure 11 - Drywall pole sander
I highly recommend that you use goggles and a dust mask when sanding.
Note: If you are taping a ceiling I highly recommend that you purchase or rent some scaffolding, as this will save your back and legs and make the project go much quicker!
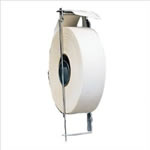
Figure A - Drywall tape holder
- Applying the tape
Try to use a continuous length of tape to cover the entire seam from top to bottom and from left to right or right to left. Overlapping the tape just adds to the complexity of getting a smooth finish.
You can purchase drywall tape holders, as shown in Figure A, that will clip on your belt, which makes feeding the tape along the seam much easier.