While some French drains are constructed using a solid PVC pipe, I do not recommend it. Not only does weeping tile direct the flow of the water, by having holes around its circumference it will allow water to exit where the ground is dry, hence, providing a natural method of watering.
Solid drainage pipe should only be used as a discharge line and when the drainage line passes areas where tree and shrub roots are present. If you use drainage pipe with holes around its circumference, it will attract tree and shrub roots, that may eventually damage the drainage pipe and prevent water from flowing. The use of a solid pipe in these areas will prevent tree and shrub roots from damaging the French drain system.
In both cases the slope should be a minimum of 1 in 200 (1 foot drop for every 200 feet of lineal distance), although I would recommend a slope of 1 in 100 if at all possible in order to provide adequate water flow. This shouldn't indicate that a French drain must be long, when in fact they can be relatively short, a few feet. French drains should be used behind retaining walls to reduce water pressure that may eventually shift or even topple the wall.
Additional information on retaining wall drainage.
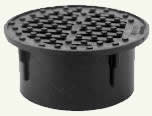
Figure 6 - Ground drain
There are a couple of primary considerations:
- The installation of a ground drain, as shown in Figure 6, at the highest end of the French Drain if there is a specific area in the landscaping that collects water.
- Determining where the water flowing in the French drain will exit. It cannot exit to a neighboring property. Exiting to roadways is usually acceptable, although the homeowner should check with their local building department to ensure compliance to any bylaws.
If there is no adequate area for drainage it may be necessary to create a drainage bed similar to that employed for septic tanks.
It is important to put some thought into planning the route of your French drain once the starting and ending points have been determined. It is not necessary that the French drain make a direct run from the starting point to the ending point. The French drain can be laid in any configuration as long as it follows a downward angle of at least 1:200.
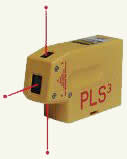
Figure 7 - Laser level
The use of a laser level (Figure 7) is a good method of determining the current topography of the property, as shown in Figure 8. Table 1 provides the definitions for Figure 8.

Figure 8 - Determining property slope using a laser level
Definitions For Figure 8 |
|
A - Low area on property |
B - Graduated stick |
C - Laser level |
D - Height of laser level from ground |
It is also possible to connect multiple collector French drains to one main French drain to carry all of the water away, as shown in Figure 9.
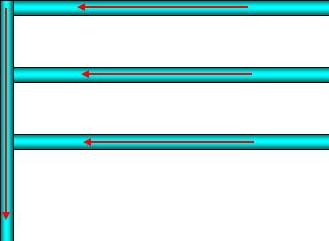
Figure 9 - Multiple collector French drains connecting to one main French drain
It is wise to call your local utilities and have them mark your property for locations of their underground pipes, electrical and communication cables. The service is usually free.
Make a sketch of the property, and drop in the route or routes of the proposed French drains. Make sure that they clear any current landscaping, such as trees and all utilities. Remember that a downward slope must be maintained at all times.
Mark the route on the property using wood stakes and string.
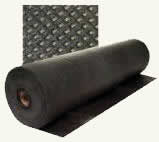
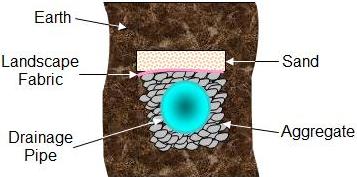
Figure 10 - Landscape fabric
The trench for the French drain can be dug by hand or you can use a small backhoe or a wide trenching machine.
- The trench should be about 10 to 12 inches wide and deep.
- Lay a 2 inch layer of aggregate in the bottom of the trench.
- Lay in the drainage pipe and cover it with geotextile or landscape fabric, as shown in Figure 10, this will help prevent the holes in the pipe from getting clogged with earth.
- Place a 2 inch layer of aggregate over the top of the landscape fabric,
- Followed by 2 inches of sand and
- Then backfill the rest of the open trench with the earth that was removed. It is best to tamp down the earth to ensure some compaction of the soil or over a short period you will have a depression in the ground following the route of the French drain.
Figure 11 shows the complete installation of the French drain.