
Gutters, as shown in Figure 1, are installed on homes to direct rainwater that hits the roof to a drainage system or away from the home to protect the foundation of the house.
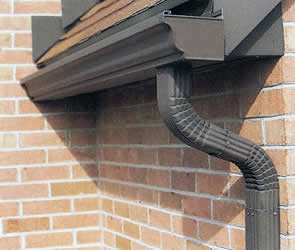
Figure 1 - Gutter on home
Overtime gutters can develop leaks at joints and seams from expansion, contraction and the introduction of excessive pressure, as well as pinhole leaks from rust and corrosion.
Note: There comes a point in the life of a gutter system that it may need replacement. Fixing major holes is only a temporary solution at best for gutters that should be replaced.
Note: The best way to prevent leaks and pinholes from developing in your gutters is to clean out debris and standing water regularly. How often this should be done is based on your environment. If your home is situated in an area where the trees are higher than the gutter system, leaves and twigs will clog the gutter system and allow standing water to occur at more regular intervals. At a minimum gutters should be cleaned yearly.
Repairing Pinhole Leaks in Gutters:
Note: Always do any repairs to sagging gutters, gutter mounting brackets and fasteners before proceeding to fix any pinhole leaks in the gutters. Repairing the mounting brackets may cause the gutter to shift and if the repair had been done it could lift or open the repaired surface.
Note: This repair can be done to both horizontal and vertical surfaces of the gutter.
- Use a wire brush or wire wheel on an electric drill or rotary tool in order to remove as much rust from the damaged gutter area as possible.
- Wipe and clean the area to be repaired to remove any loose pieces of rust and any dirt and grime on the inside surface of the gutter.
- Apply a rust converter to the surface. Rust converter is available in spray cans and its use inhibits any remaining small rust areas from expanding.
- After the rust converter is thoroughly dry you can commence the actual repair.
- Apply a thin coat of roof cement around the leak.
- Place a layer of tinfoil over the roof cement. The tinfoil should not cover the edges of the roof cement, allow about a 1/4 inch of exposed roof cement around all the edges of the tinfoil.
- Using a putty knife push the piece of tinfoil into the roofing cement.
- Place another thin layer of roof cement over the tinfoil completely covering it and the previously exposed edges of roof cement. Try to create an angle to the edges of the patch. This will make it easier for water to flow over the patch. The total thickness of the patch should not exceed 1/8 inch. If it is thicker than 1/8 inch you may inadvertently create a water dam.
The completed application of roof cement, tinfoil, roof cement is shown in Figure 2. The drawing is not to scale in order to properly show each layer.

Figure 2 - Pinhole leak gutter repair
If you are repairing a hole rather than a pinhole, use a piece of sheet metal rather than the tinfoil.
Repairing Leaks in Gutter Seams & Joints:
Having a gutter seam or joint open up is not uncommon. Gutters expand and contract with changes in temperature and this can often lead to leaks.
Note: One of the biggest causes of leaks in gutter joints and seams is leaning extension ladders against the gutters. The weight of a person and the extension ladder will cause the gutter to bend inwards and if it is close to a joint of seam the change in shape of the gutter can break the water seal of the joint or seam.
- Clean the affected joint, any caulking or sealant will not adhere to dirt and grime. Make sure the joint is thoroughly dry.
- For aluminum or galvanized gutter material use a high quality gutter caulk. For plastic or vinyl gutters use a polyurethane caulk. Both of these caulk products are available at the big box home improvement centers or building supply retailers.