
Step 1:
The positioning and layout of the border is critical. You want the boards that are in the field and on the edge, that are in contact with the border to be the same width, as shown in Figure 10. This will require some detailed measuring and planning.
Use a chalk line to outline the inside perimeter of the border on the sub-floor as shown in Figure 11.
Once you have determined the layout and positioning it is wise to lay the boards on the floor prior to nailing to ensure that the finished positioning will be what you want and that your measurements and/or calculations are correct.
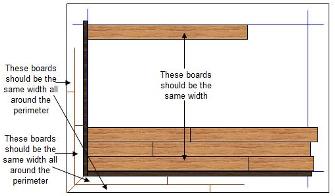
Figure 10 - Calculating the width of the hardwood flooring boards
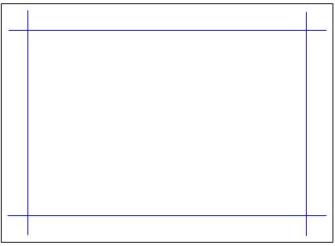
Figure 11 - Position of border using chalk lines
Step 2:
Install the bottom and left side of the border, with adhesive, with the grooves of the border boards facing inwards, as shown in Figure 12. Make sure that the boards are seated firmly on the sub-floor, use a carpenter’s mallet and scrap piece of lumber to tap on the top of the boards.
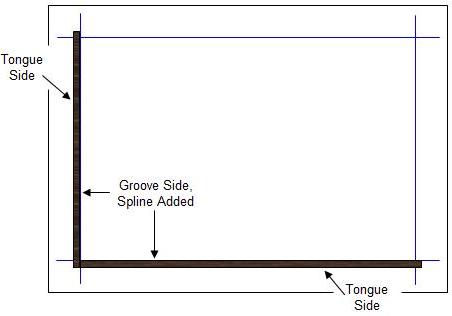
Figure 12 - Installing the hardwood flooring border
With the border boards in their proper position nail through the tongues on a 45 degree angle making sure that you do not shift the positions of the boards while nailing.
Install a spline in the left side and bottom side border board, as shown in Figures 5 and 12. The spline should be glued into position, using yellow carpenter's glue in the border boards only. Install the hardwood flooring boards, using a nailer or stapler, starting at the lower left hand side, as shown in Figure 13. Allow the boards to overlap the right hand side chalk line. They will be trimmed square once the entire inside of the border area has been completed.
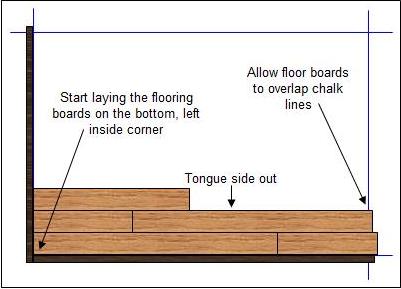
Figure 13 - Laying hardwood flooring against border
Step 3:
Once the main flooring boards have been installed, up to the top chalk line and over the right chalk line, you can install the upper border piece. At this point the project should appear similar to Figure 14.
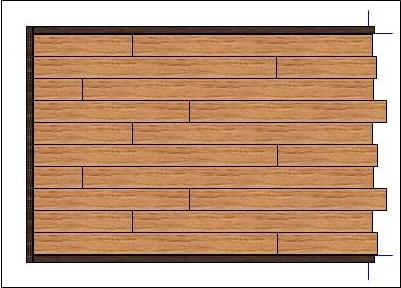
Figure 14 - Bottom, top and left hardwood border installed
Step 4:
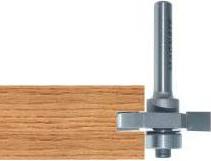
Figure 15 - cutting groove in edge of hardwood
Remark the chalk line on the right hand side and using a straight edge and a circular saw with a carbide tipped blade cut the excess material off of the flooring boards from the right hand side.
Step 5:
Using the router with the carbide tipped slot cutter, create a groove, the same size as the groove in the flooring boards, in the right side flooring as shown in Figure 15.
Install a spline in the groove of the right hand side border board and glue the spline into position. Attach the right hand border board using nails or staples through the spline on the right hand side.
Step 6:
Lay the hardwood flooring boards around the outside of the border.
The actual layout of the outside floor boards is a matter of personal taste. However, the most common installation is to create a picture frame, 45 degree angle from the point of the 90 degree angle of the border, as shown in Figure 16.
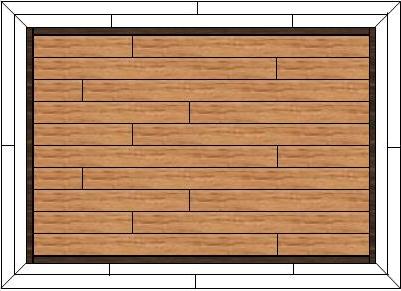
Figure 16 - Outside border flooring boards
Boards that are cut at a 45 degree angle should have splines inserted in them. It can be very difficult to route a slot in the end of hardwood flooring board without the aid of a router table.