
Each and every hardwood floor is somewhat unique as no two wood grains are ever identical. Hardwood flooring provides an elegance and warmth that no other material can deliver. If, however, you want to enhance your hardwood floor and make it a focal point of a room or hallway one way to accomplish it is with the addition of hardwood floor medallions, as shown in Figure 1.
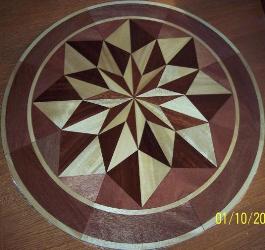
Figure 1 - Hardwood flooring medallion
Up until a few years ago, hardwood floor medallions were only found in the homes of the rich and famous, due to the high cost of fabrication and installation, as it was necessary to design and fabricate each medallion on site. Modern production techniques now create hardwood flooring medallions that match current hardwood flooring thicknesses and tongue and groove installation methodologies.
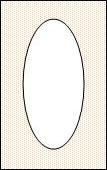
Figure 2 - Oval medallion template
Hardwood floor medallions come in circular, oval and rectangular shapes. Most medallion manufacturers will supply a cut-out template, as shown in Figure 2, matching the exact size of the medallion to be installed.
The hardwood medallion is not made of solid pieces of hardwood. It is much closer to engineered hardwood in its method of construction. In most cases the pieces of hardwood, approximately 5/16 inch thick, are laminated to a piece of birch plywood. The total thickness, of 3/4 inch, matches most new hardwood floor thicknesses.
Pre Installation:
As with any hardwood, engineered hardwood or laminate flooring material, the medallion should be allowed to acclimatize to the room's humidity before installation, for at least 48 hours, 72 hours is even better. Failing to acclimatize the medallion can lead to cracking and buckling of the medallion. Always follow the manufacturer’s recommendations.
Additional information on acclimatizing hardwood flooring before installation
The following instructions are based on installing a hardwood medallion in a hardwood floor that has already been laid. In fact, if you are installing a circular or oval medallion, it is easier to lay the down the hardwood floor first and then cut-out for the hardwood medallion than to try and construct the floor around the medallion. In the case of a rectangular medallion, it can be installed first and then install the hardwood floor boards from the medallion towards the walls or you can install it in the same manner as a circular or oval medallion – lay the hardwood flooring first.
Step 1:
Determine the position of the medallion on the floor. The best way to do this is to actually take the medallion and lay it on the floor, stand back and look at it from different angles. Remember, that you cannot easily change the position of the medallion once you have committed to a location.
Step 2:
Once you have the basic position of the hardwood medallion, mark the spot. Remove the medallion and place it in a safe location, out of harm’s way. Place the template on the floor in the position marked with the hardwood medallion and measure from the sides of the templates to walls to ensure that it is perfectly centered on the floor. Mark the outside of the template all the way around.
Note: Make sure that the dimensions of the sides of the template are identical!
If you have a pre-finished hardwood floor, you can use duct or painters tape around the edge of the template to hold it in position. Tape all four sides. If you have an unfinished hardwood floor you can use tape or small finishing nails. The holes left by the finishing nails will disappear when the hardwood floor is finished.

Figure 3 - Plunge router
Figure 4 - Router circle cutting jig
Step 3:
Using a plunge router, Figure 3, and a 3/16 inch carbide tipped bit, route out the hole in the template. Use multiple passes, taking out a little bit of lumber at a time. After each pass, look at the area that has been routed and look for nail or staple heads that might have been used to hold the hardwood boards in position. You do not want to hit one with the router bit.
If you have a rectangular template the corners will have to be removed using a very sharp chisel, as the router cannot make a 90 degree cut.
If you are installing a true circular hardwood medallion you can use a router circle cutting jig, as shown in Figure 4, for the router, pivoted at the exact center of where the hardwood medallion will be installed.
Note: Hardwoods burn easily when being cut. Do not allow the router bit to remain in one location. Use a smooth, steady motion when routing and always use a carbide tipped router bit!