
It is not uncommon to desire a wall switch for a light that is currently switched with a pull cord or chain.
Lights with pull cords are a common occurrence in basements and closets and as most are not overly aesthetic many homeowners wish to change them to a standard light fixture with a switch.
To install the switch, you should first understand some electricity basics.
The light fixture can be a porcelain or plastic basic lamp holder as shown in Figure 1, a strip fluorescent fixture as shown in Figure 2 or other style of light fixture that contains an integral switch.
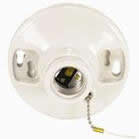
Figure 1 - Plastic lamp holder with pull chain
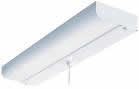
Figure 2 - Fluorescent light fixture with pull chain
The light circuit that you wish to add the switch to must have a wire which supplies the power, usually black, a wire to return the power back to the distribution panel (usually white) and a ground wire (usually bare copper). In older homes, the ground wire may not be present.
Install the electrical box that will house the switch in the appropriate position, an old work
electrical box is convenient for this type of installation, see Figure 3.
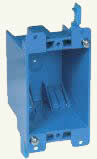
Figure 3 - Old work electrical box
Additional information on: Installing an old work electrical box.
Run a 14/2 + ground cable, from the switch box to the electrical box where the light fixture is located.
Additional information on: Fishing electrical wires.
All of the connections in the switch box can be made prior to turning any power off. Do not place the cable into the electrical box that holds the light fixture until the electrical power to that box has been turned off.
Turn off the breaker or remove the fuse that supplies power to the fixture!
In order to insert a switch into the circuit you must expose the electrical connections. In the case, of the basic lamp-holder, the two screws that hold the unit in position are clearly visible. In the case of a fluorescent fixture the screws are usually located behind the plastic opaque cover. Remove the screws and allow the fixture to hang from the wires.
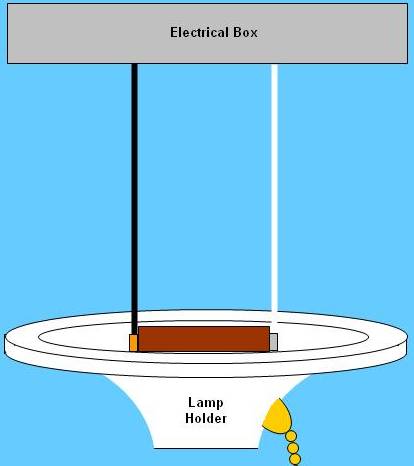
Figure 4 - Wiring connections to porcelain lamp holder
The wiring to a porcelain or plastic lamp-holder should resemble Figure 4. A porcelain or plastic lamp-holder uses screw terminals located directly on the lamp socket. There may be additional wires in the electrical box, they can be ignored.
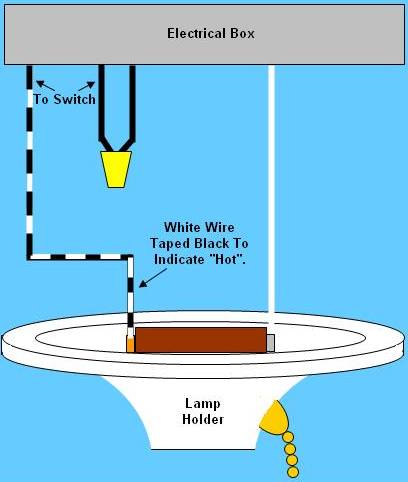
Figure 5 - Wiring to a porcelain lamp holder using a switch
The black or hot
wire is removed from the terminal on the lamp socket and replaced with the white wire from the switch (it is taped black to indicate that it is a hot
wire), see Figure 5. The black wire that originally went to the terminal on the lamp socket is tied to the black wire that comes from the switch, using a wire nut.
If you are replacing a pull-chain fixture with a standard fixture then the white wires coming from the electrical box are connected together with wire nuts. The white wire coming from the switch connects to the black wire of the light fixture and the ground wires are connected together in some manner, as shown in Figure 6.
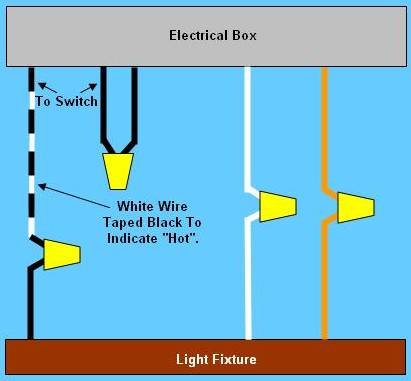
Figure 6 - Wire connections from a switch to a fluorescent light fixture.
With regard to ground wires, some fixtures will have a copper wire attached to them which should be tied to the ground wires and ground screw in the electrical box. Other fixtures may have a ground screw on the fixture. In this case a wire is run from the ground screw in the electrical box to the ground screw on the fixture.
Figure 7 provides an overview of what the electrical connection with a switch looks like:

Figure 7 - Basic wiring diagram of a light controlled by a switch
If you consider that the installation of the switch is to break the black live
wire, you should be able to identify any minor discrepancies in the diagrams above and your exact situation.
The switch wiring is very easy, as you have a white wire, which should be taped black to indicate that it is a hot
wire, a black wire and a ground wire. The ground wire connects to the switch frame using the upper screw on the side of the switch. The black and white (taped black) wire are interchangeable on the two screws on the side of the switch.