
Prior to installing insulation you have to consider the installation of a vapor barrier system to protect the insulation from any moisture ingress.
Moisture trapped within the cells of any insulation increase its thermal transfer abilities, hence it lowers its R-Value or insulating capability.
Water vapor molecules can pass through gypsum board (drywall), as shown in Figure 7a.
Moisture also creates other problems such as rot and mold which not only damages a home but can be a health hazard to you and your family.
Additional information on: Mold
Moisture trapped in the air circulating within a home can permeate walls and ceilings through the smallest of entry points. One of the most common entry points is through TV cabling, receptacle and switch outlet boxes, that are mounted on exterior walls, as shown in Figure 7b.
Other areas include wall mounted, forced air cold air returns and floor mounted heating vents.
In kitchens and bathrooms it is not uncommon to have the water and drainage pipes penetrate wall surfaces without any moisture or vapor barriers installed around the openings.
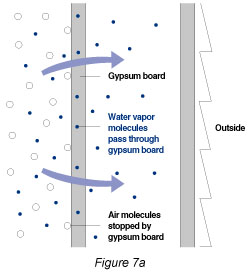
Figure 7a - Installing a vapor barrier to a wall
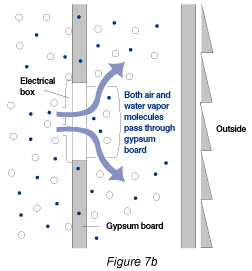
Figure 7b - Installing vapor barriers to electrical boxes
Retrofitting a vapor barrier can be a very expensive exercise and in most cases homeowners are not prepared to incur the expense or the disruption to their homes.
Alternatives are available:
- In kitchen, bath and laundry rooms painting with an oil based paint or a specially formulated vapor barrier primer will help dramatically.
- Use expanding foam insulation around any holes in walls for water, drainage pipes and vent pipes.
- Use caulk to seal gaps between floor boards and joists for floor vents.
- Use caulk to seal gaps between studs and drywall in cold air returns.
- Install gaskets behind cover plates in all electrical receptacles and switches, including those on interior walls, as shown in Figure 8. Turn off power before installing gaskets.

Figure 8 - Installing gaskets behind switch and receptacle cover plates
It is almost impossible to retrofit a complete solution, but the more corrections that you implement the better the total situation.