
With a bit of planning and patience you can paint the interior of your home and have your friends and neighbors think a professional did it. If you want to have a professional looking finish then you must prepare the walls, ceiling and trim. Paint does not hide holes cracks and blemishes in drywall or wood. Paint over a crack and you will have a freshly painted crack.
Proper preparation will be the most time consuming part of your painting project.
But, it is well worth the effort.
Preparation Tips:
- If at all possible remove all pictures, furniture and carpeting from the room. If this is not possible cover them with plastic painters tarps (Figure 1).
- Remove door knobs, light fixtures (if you are painting the ceiling - tuck the wires deep into the electrical box), outlet (receptacle), switch, TV, and telephone cover plates. For casement windows and door hinges use painters masking tape, usually blue or green to cover any exposed metal surfaces.
- Remove any heating, ventilation and/or air conditioning grills that are not to be painted. I recommend that all grills be removed even if they are going to be painted and paint the grills independent of the wall or ceiling. If, at a later date it is necessary to remove the grill for cleaning or other reason, you will not end up with paint flakes and paint chipping when the grill is removed as the paint will not have created a bond between the wall or ceiling and the grill.
- If you have wall hung pictures and they are going to be replaced in the same location, you can leave the picture hangers in the wall. However, you will have to be careful when running the paint roller close to the fasteners, as they will capture paint which will have a tendency to run down the wall.
- Any flaking paint on the walls must be removed using a scraper. Check around window frames and sills.
- If there is damaged drywall, (not uncommon under windows) the old damaged drywall should be removed and replaced with a new piece. Of course the new piece must be taped, have joint compound applied and the joints must be sanded smooth.
- If there is noticeable dirt on the walls or ceiling you should wash the walls. A lot of wall and ceiling dirt has a grease base (this is very common with oil fired furnaces). Most paints do not adhere or cover grime very well.
- Take a look at the amount of paint that currently resides on any window trim, door molding or door panels. In older homes there can be many layers of paint that may be hiding the delicate curvatures of the wood. If you have a lot of paint on window trim, door molding or door panels you may want to consider removing it down to bare wood before you add another layer of paint.

Figure 1 - Painter's plastic
You may want to consider putting some painter's masking tape, as shown in Figure 2, over the switch and over the outlets (receptacles) as you are painting. This avoids the problem of trying to remove paint splatter from switch and outlets (receptacles).
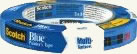
Figure 2 - Painter's masking tape
Do not use general purpose masking tape.
You can mask the grills rather than removing them. However, you must cover the entire grill as fine paint splatter from the roller will settle on the grill surface.
If you are not hanging the pictures in the same location the picture hangers must be removed and the resulting holes patched. Paint will not hide, even the smallest nail hole.
Old paint can be removed using paint removers (Figure 3) or sanding or a combination of both.
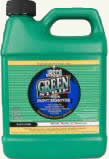
Figure 3 - Paint remover
Note: If you are using paint removers follow the manufacturer's instructions for usage and on the preparation of the surface before painting. Many paint removing solvents have to be washed off in order to allow fresh paint or stain to adhere to the wood.
You can also purchase electric detail sanders Figure 4, which are designed to get into small crevices, these new electric sanders along with a rotary tool (Figure 5) can avoid the need to use paint removers.
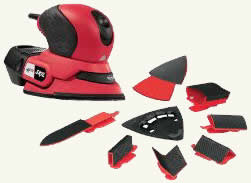
Figure 4 - Detail Sander
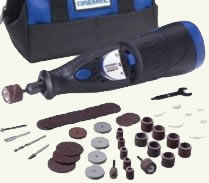
Figure 5 - Rotary tool
Additional information on removing paint and other finishes