
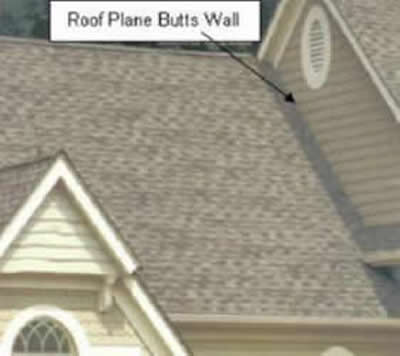
Figure 1 - Roof plane butting against wall
The proper installation of flashing at the point where the roof meets wall is to use metal step flashing. Metal step flashings are pieces of metal that are shaped like an "L", at least 5 inches wide and tall and 8 inches long, as shown in Figure 2.
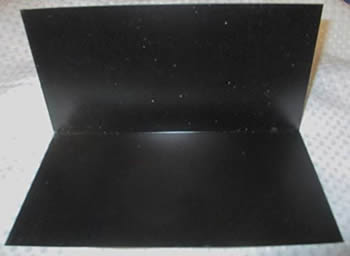
Figure 2 - Step Flashing
A common error is to install all the flashing against the wall before installing any of the shingles. This is an incorrect procedure.
The step flashing must be installed during the installation of the shingles as each row of shingles overlaps the previous piece of flashing.
If the flashing being installed is butting against a wall that has wood, vinyl, cement board or aluminum siding, the flashing should be installed before the siding is installed, so that it sits underneath it.
If the flashing is being installed against a brick wall then the flashing should sit against the wall and have a layer of asphalt cement between it and the wall.
Stucco presents its own logistics problem. If the stucco is already in place then the flashing must rest against the stucco in a similar manner to that of a brick wall. If the stucco has not been installed then the flashing should be underneath the stucco.
Step 1:
Apply the roofing felt and nail the first piece of step flashing to the lowest point where the roof meets the wall as shown in Figure 3. The step flashing should have a layer of asphalt cement below it.
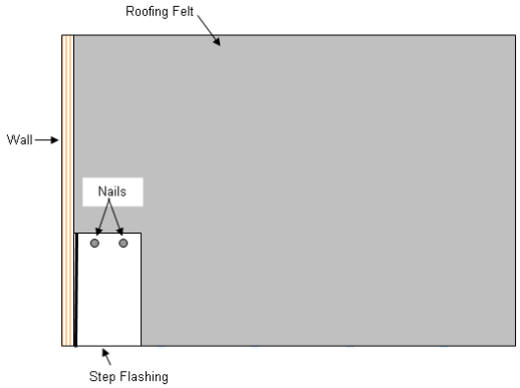
Figure 3 - Installing first piece of step flashing
Step 2:
Apply a layer of asphalt cement on top of the flashing and install a shingle on top of the step flashing as shown in Figure 4.
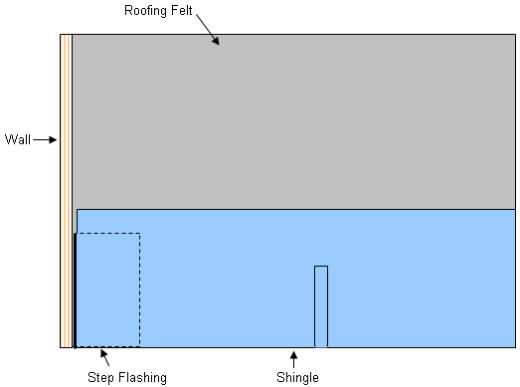
Figure 4 - Installing shingle over first piece of step flashing
Step 3:
Install another piece of step flashing on top of the shingle that was just laid and embed it in a layer of asphalt cement, use two nails on the top of the flashing. Each piece of step flashing should overlap the previous piece by a minimum of 2 inches, but should not protrude farther than the leading edge of the next shingle - see Figure 5 and 5b.

Figure 5 - installing second piece of step flashing on top of shingle

Figure 5b - Installing shingle on top of second piece of step flashing
Continue laying the step flashing, asphalt cement and shingles in this manner until you have reached the peak of the roof.