
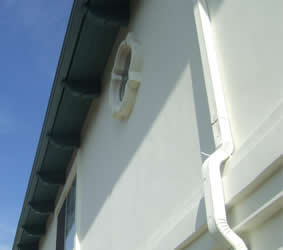
Figure 1 - Roof overhang
There are two basic types of overhang, or cornice, conditions – the flush, or simple cornice and the rafter overhang, which can be opened or closed, as shown in Figure 2a, 2b and 2c
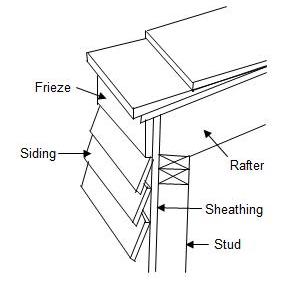
Figure 2a - Flush or simple cornice
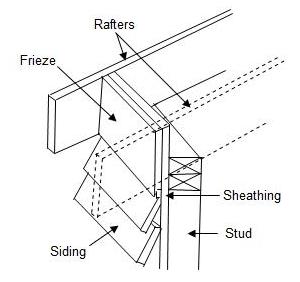
Figure 2b - Open overhang
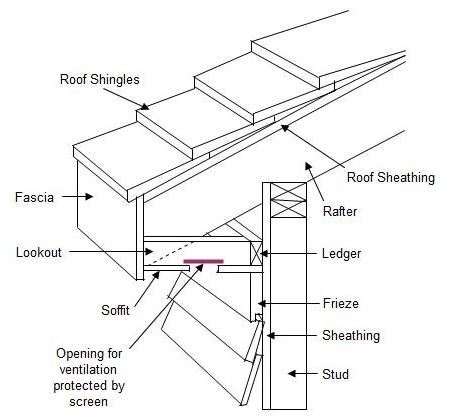
Figure 2c - Box or closed cornice
Flush and Open Overhangs:
Both the sheathing and building paper should have been notched to fit around the rafters. The rest of the installation consists of laying out, beveling, notching and nailing on the frieze, as shown in Figure 2a, 2b and 2c.
In the case on open overhangs, cut the frieze to fit between rafters, as shown in Figure 3. For flush cornices cut the frieze to span between the building’s corners. Level the pieces, tack them in place, and nail them. The joists should be smooth and square for a tight fit.
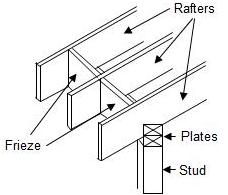
Figure 3 - Open overhang
Boxed-In Overhang:
A boxed-in or closed overhang requires more work. This type completely hides the rafters with a fascia and soffit.
Start by leveling across between the rafter overhang to the wall, as shown in Figure 4. Do this at both ends of the overhang and snap a chalk line, as shown in Figure 4.
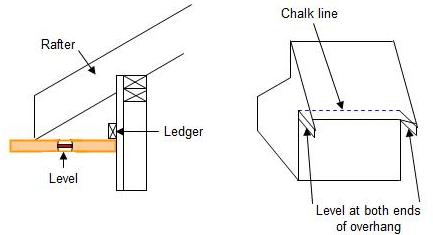
Figure 4 - Placing chalk line for overhang
Nail, aligned with this line, a ledger, or nailing strip, as shown in Figure 5. Lay out and cut the lookouts. Set them in place, level, and nail them. First nail to the rafter and then toe-nail to the lookout ledger. The lookouts can be also installed in the framing stage and nailed directly to the rafters and studs.
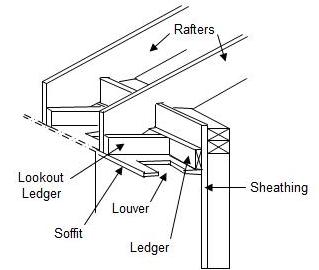
Figure 5 - Installing ledger boards for overhang
The next step is to cut out the plywood soffit. Openings should be provided in the soffit for ventilation. These openings are protected with screen to prevent insects from flying into the building. Ventilation louvers are also available. Which only require installation into the openings. With the soffit cut out and ready, nail it to the bottom of the lookouts, making sure it’s level.
Additional information on soffit and attic ventilation.
The fascia is installed next. It is nailed directly to the ends of the rafters and lookout, as shown in Figure 2c. The fascia should extend about 1 inch below the soffit to provide a drip edge. The top is beveled to meet the roof slope. A frieze is later installed under the soffit as shown in Figures 2a, 2b and 2c.