Figure 1 - Underground sprinkler system in front of home
An underground sprinkler system is made up of an assortment of valves, heads, pipe and fittings. It may also include an electronic timer and controller that will turn the sprinklers on and off on different days and at different times of the day or night.
Figures 2 through 10 show the different components that are used to make up an underground sprinkler system:
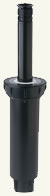
Figure 2 - Pop-Up Sprinkler Head
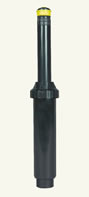
Figure 3 - Rotary Sprinkler Head
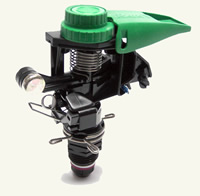
Figure 4 - Impact Sprinkler Head
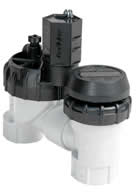
Figure 5 - Anti-Siphon Valve
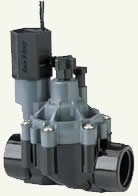
Figure 6 - Electric Zone Solenoid Valve
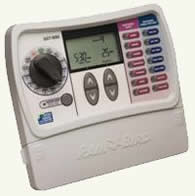
Figure 7 - Timer / Controller
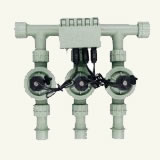
Figure 8 - Manifold
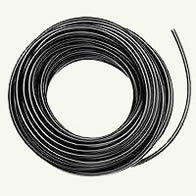
Figure 9 - PVC Tubing

Figure 10 - Pipe Fittings
Every manufacturer has there own methods of putting these parts together to provide a complete system that will water your lawns and gardens.
Pop-up sprinkler heads will be at the surface level of the ground (allowing you to mow right over them) unless they have water running through them, in which case they stand-up above the grass level. It should be noted that pop-up heads are notorious for not falling back to a level position (it is only gravity that brings them back to a position that is level with the ground and there are few homeowners, that have underground sprinkler systems, that have not had to replace sprinkler heads after they have cut them off with a lawnmower. The reason they do not fall back is usually attributed to grass clippings or stiff grass getting underneath the head portion. To avoid this problem you should check the area underneath the sprinkler head often, especially after mowing the lawn.
A quick walk around inspection of your lawn is always prudent. Not only to identify sprinkler heads which may not have seated themselves level with the ground, but to look for other objects such as stones and if applicable in your area, children's toys!
It is generally not necessary to use one manufacturer throughout your system. All manufacturers make their sprinkler heads so that they will work with standard pipe fittings. The only accessories or components that you have to check the specifications of, are the electric valves. You must ensure that your controller / timer has the necessary voltage and current outputs to drive the valves open and closed.
As an example, you can have zones which provide water for drip irrigation and other zones that use standard sprinkler heads.
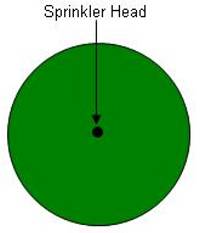
Pop-up valves come in a four basic configurations, each waters a different segment of a circle. As well, most of the impact and rotary sprinkler heads can be set to one of these four configurations.
The area in green signifies the segment that would be watered, based on the degrees chosen for a specific watering head. Figure 11 shows a sprinkler head with a 90 degree setting, Figure 12 shows a 180 degree setting, Figure 13 shows a 270 degree setting and Figure 14 shows a full 360 degree setting.
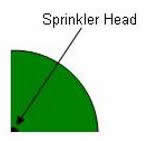
Figure 11 - 90 degree sprinkler head watering diagram
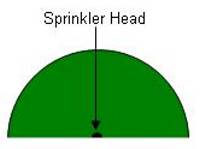
Figure 12 - 180 degree sprinkler head watering diagram
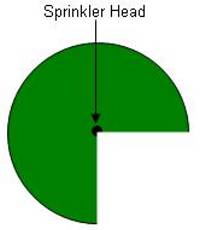
Figure 13 - 270 degree sprinkler head watering diagram