
Problem: Moisture damage inside the stucco wall assembly.
Cause: Entry of water, usually rain and snow around the edges of stucco penetrations.
The most common entry sources of water leakage into the stucco wall assembly is due to poor flashing and the sealing around window and door penetrations.
Water that is not properly directed away from around windows, doors, vents and other penetrations, can run behind the stucco veneer and into the wall assembly. If there is a failure of the sheathing-membrane it will allow water to penetrate into the entire framing assembly. If water is let to stand in the wall assembly it can eventually lead to:
- rotting of the structural members and sheathing,
- staining of the interior finishes.
Solutions:
- Tar-saturated felts / papers are not permitted as sheathing, membrane below stucco veneer. The installer must ensure that the sheathing paper or house wrap provides total coverage and is free of rips and tears. Additional protection can be provided by using doubled layers of building paper or house wrap, where seams do not lap each other.
- Install sheathing paper correctly around openings to prevent water penetration.
- Sheathing paper or house wrap must be installed in a shingled manner, allowing water to run down the wall. Overlap the piece of sheathing paper at the bottom of the opening with the sheathing paper that surrounds the opening as shown if Figures 50a, 50b, 50c, 50d and 50e.
Step 1
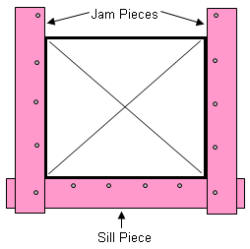
Figure 50a - Attaching flashing paper at edge of window opening
- Only attach the flashing paper at the edge of opening. Install the sill piece of flashing paper first. The jamb pieces of flashing paper overlap the sill piece.
Step 2
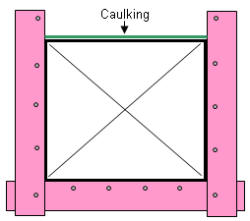
Figure 50b - Applying a bead of caulk around the window
- Apply a bead of caulk within 1/2 inch (13 mm) of opening.
Step 3
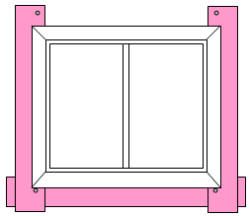
Figure 50c - Inserting window nailing strip in caulk
- Insert nailing flange into caulk and fasten to both the sill and the jamb.
Step 4
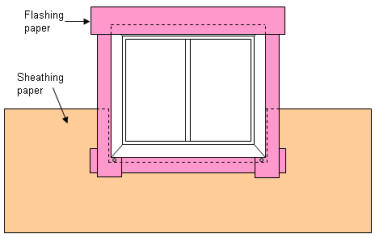
Figure 50d - Applying flashing paper over window nailing flange
- Apply flashing paper at top over the nailing flange. Insert the sheathing paper beneath the sill and jamb flashing paper
Step 5
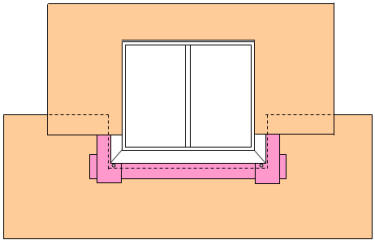
Figure 50e - Applying sheathing paper over flashing paper
- Place sheathing paper over flashing paper and lower sheathing paper.
- Use proper flashing and sealing techniques around window and door penetrations as shown in Figures 51a and 51b.
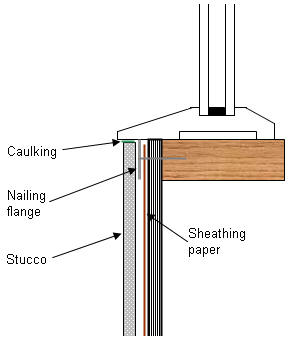
Figure 51a - Lower Water Barrier Around Doors And Windows
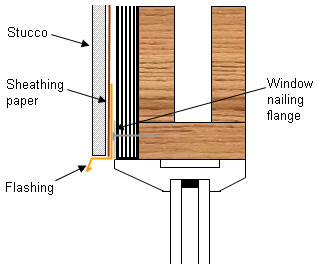
Figure 51b - Upper Water Barrier Around Doors And Windows
- Flash windows and doors to divert water from the cladding in all locations where the distance from the tops of windows or doors to the soffit is less than one quarter of the soffit overhang length.
- Extend head flashings up the wall a minimum of 2 inches (50 mm), ensuring that the building paper overlaps the flashing.
- Use good sealing techniques around window and door penetrations.
- Where stucco runs up to windows and doors, install an elastomeric sealant to prevent water penetration.
- Where door and window sills do not provide total protection from water penetration, an elastomeric sealant should be applied below the sill.