A relatively simple and valuable home improvement that can be handled by most of the DIY home handyman is insulating the attic access.
One of the most common areas that is not insulated, in a home is the attic access panel.
Whether your home has a removable panel that you access with a step ladder, a pull down ladder or a door in a wall, insulating the access panel is of the utmost importance.
Without proper insulation you will loose heat in the winter and gain heat in the summer.
Attic Access Panel:
The simplest of the attic access panels is often called a scuttle hole or attic hatch, as shown in Figure 1.
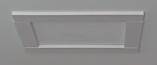
Figure 1 - Attic access panel / hatch
The panel is generally suspended by some wood trim or molding and pushes up into the attic space when access is required. In many cases this type of entry is located in closets so that it is out of view.
Figure 2 depicts a common installation of an attic access panel. There is no insulation on the panel nor is there any weather stripping around the edges of the panel.
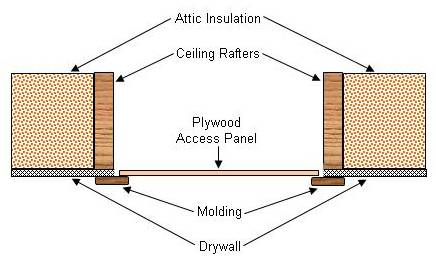
Figure 2 - Common installation of an attic access panel / hatch showing lack of insulation
This is an easily correctable situation!
Add rigid foam insulation to the top of the access panel and foam weather stripping (the easiest weather stripping to use is the self adhesive foam to the top of the molding, as shown in Figure 3.
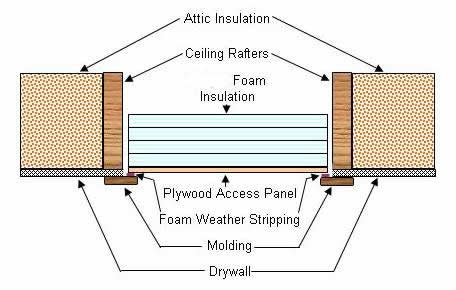
Figure 3 - Rigid foam insulation and weather strip applied to attic access panel / hatch
Use a construction adhesive made for rigid foam insulation to attach the foam to the plywood and the foam layers together.
The ceiling texture, at least where the trim or molding is, should be flat.
A popcorn or decorative ceiling will not allow the trim or molding to sit tight against the ceiling surface. If necessary remove the popcorn or texture on the ceiling, under the trim or molding.
Additional information on removing a popcorn ceiling.
Although some sites may recommend the use of batt insulation in addition to the riged foam or in place of the rigid foam, I have found that after a period of time the batt insulation compresses and spreads out and makes it very difficult to place the panel back into position after entry into the attic.
Pull Down Stairs:
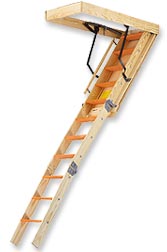
Figure 4 - Attic pull-down stairs
The most efficient and simplest method of sealing attic pull-down stairs, as shown in Figure 4, is to make a lid that sits above the stairs and rests on the rafters. The box is then pushed to the side when entry to the attic is required.
Figure 5 depicts the construction of pull-down stairs that are not insulated.
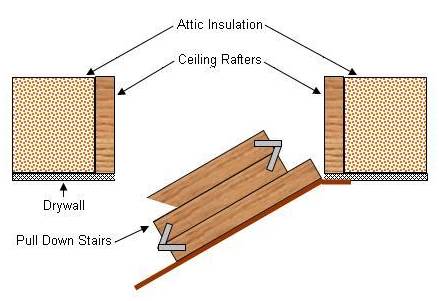
Figure 5 - Attic pull-down stairs without insulation or weather strip
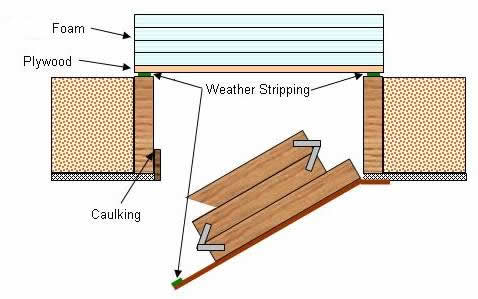
By adding a plywood lid that has layers of riged foam and weather stripping around the perimeter of the entry, as shown in Figure 6, you will be stopping air flow from and to the attic.
Weather stripping should also be added to any contact points.
If the pull-down stairs has its own box that attaches to the floor joists, caulking should be used to seal those joints.