
- The cracked brick must be removed. There are numerous ways to go about this, but the most important thing to remember is that you do not wish to damage any of the adjoining bricks, so be patient and take it slowly. It is easy for a chisel to slip or a grinder to run away.
Note: It is important to wear safety goggles whenever you are removing bricks and/or mortar.
Brick removal methods:
- A masonry chisel, as shown in Figure 4, will break through the brick and surrounding mortar. The masonry chisel shown has a protective hand shield, which I highly recommend. Use a 3 to 4 lb., as shown in Figure 5. A normal 16 oz. claw hammer does not provide enough weight to do the job.
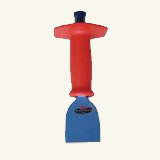
Figure 4 - Masonry chisel

Figure 5 - 4 lb. short handle, sledge hammer
- The use of a hammer drill, as shown in Figure 6 and an assortment of hammer drill chisel bits, as shown in Figure 7, will remove the brick and surrounding mortar quite easily.
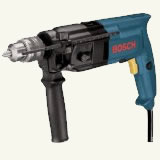
Figure 6 - Hammer drill
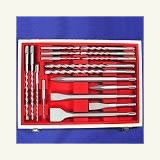
Figure 7 - Hammer drill chisel bits
- The third method is to use a handheld grinder, as shown in Figure A, with a masonry disc, as shown in Figure B. In general I do not recommend this method as it is not quite as convenient a method as using a masonry chisel or hammer drill and requires more care and patience. It is also more dangerous as masonry discs break and pieces can become ballistic missiles.
A wire brush, as shown in Figure C, comes in handy to remove smaller pieces of debris.
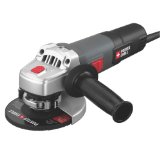
Figure A - Grinder
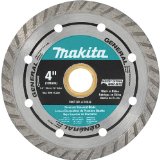
Figure B - Masonry disc
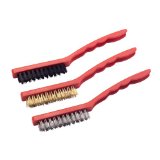
Figure C - Wire brushes
- Once all of the brick and the mortar that surrounds the hole where the brick was has been removed, vacuum the hole to remove all small pieces of debris and dust. Do not use a power washer as the area behind the brick will not stand up to a pressure washer.
- The mortar that surrounds the other bricks may have a unique color and has been weathered. If you take a piece of mortar to a builder's supply facility they should be able to advise you on color pigments to match the color of the current mortar. Do not go to a big box retailer, in most cases, they will not have a selection of pigments and they do not have the expertise.
- If you have purchased used bricks or have removed a brick from another location, make sure that all of the surrounding mortar is removed. It is also recommended that you place the brick in a bucket of water for a few hours to allow it to become saturated. Old bricks are very dry and they will suck the moisture out of the mortar, creating an imperfect bond.
- Mix the mortar according to the instructions on the bag and input from your builder's supply expert, if applicable.
- Using a spray bottle filled with water, moisten the inside surfaces of the bricks that are in place.
- Place a 3/4 inch layer of mortar on the top of the brick that the new brick is to rest on.
- Put mortar on the sides and top of the replacement brick, this is called
buttering
. - Push the replacement brick into position. Some mortar may be be pushed out. Using a small pointing trowel, as shown in Figure 9, push the mortar into the joints, making sure that there are no voids.
Note: This is one area where the home handyman often fails. It is critically important that the mortar be mixed thoroughly and be of the correct consistency.
It should be noted that some individuals prefer to place the brick into position and then use a mortar bag, as shown in Figure 8, to fill the gaps.
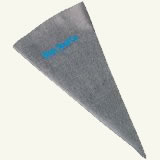
Figure 8 - Mortar bag
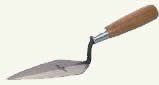
Figure 9 - Pointing trowel
The use of a tuck pointing trowel, as shown in Figure 10, can help push the mortar between the bricks and the use of brick jointer, as shown in Figure 11, will configure and smooth out the mortar.
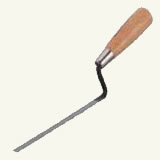
Figure 10 - Tuck pointing trowel

Figure 11 - Brick jointer
- If you are working in a hot climate or the brick being replaced is located in direct sun, it is suggested that you spray, using a fine mist, the mortar joint with water everyday for 3 days.