
Water leaks around your bathtub, as shown in Figure 1, can be caused by four different situations. You can have a cracked tile, missing or deteriorated grout between tiles or missing or deteriorated caulk between the tiles and the bathtub. This article will concentrate on how to caulk around the bathtub.
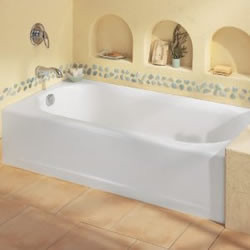
Figure 1 - Bathtub
Applying caulk around your bathtub is not a difficult project. However, it is not quite as easy as the home improvement shows would have you believe. Laying a good bead of caulk requires some practice and as it is with many home improvement projects it is the preparation that can make the difference between a successful outcome and a job which you wouldn’t want your neighbors to see.
To caulk your bathtub, follow these steps:
Step 1
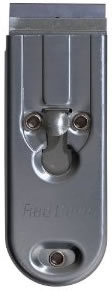
Figure 2 - razor blade scraper
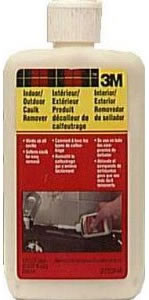
Figure 3 - Liquid caulk remover
As a general statement caulk will not adhere to old caulk. So the first step in the project is to remove the old caulk. You may be able to peel a large portion of the old caulk off by using a razor blade scraper (the type of razor blade scraper that is used to remove paint from windows, as shown in Figure 2) to lift a portion of the old caulk and pulling it away from the joint.
Any caulk that cannot be pulled away from the joint will have to be removed using the razor blade scraper, by placing the edge of the razor blade between the caulk and the surface of the tile or the bathtub. It may be necessary to use the scraper first between the tile wall and the caulk and then between the bathtub and the caulk.
Safety: Razor blade scrapers are extremely sharp, be very careful when using them. Never place the hand that you are not using or your body in a position in front of the blade. If the razor blade scraper should slip, you want it to hit a tile wall, not any part of your body.
All of the old caulk must be removed! Ninety-nine percent is not good enough!
Note: Many homeowners will only remove the caulk around the bathtub that appears to be damaged or apply caulk to areas where the caulk is missing. If you only do a partial job, it is highly likely that you will have leaks where the new caulk tries to bond with the old caulk. I highly recommend that you replace all of the caulk, not just portions.
Note: Some older caulks set-up, hard as a rock and can be almost impossible to remove even with the razor blade scraper. To soften these older style caulks so that they can be removed you can purchase liquid caulk removers, as shown in Figure 3. To use the liquid caulk remover, dampen a piece of paper towel with the caulk remover and lay it over the caulk. Cover the dampened paper towel with painters tape and leave it to soak overnight.
You should also remove and apply new caulk to all the other areas where water may penetrate the walls. This includes the caulk that is around the faucets, shower arm and any soap holders on the interior of the bathtub area and between the bathtub and the outside walls and the floor on the outside of the bathtub area.
Note: It is not uncommon to find that there is a bead of caulking where two tiled walls meet in the bathtub area. If you have old caulk on butting tile walls this caulk should also be removed and replaced.
Step 2
Caulk will not adhere to soap scum or dirt. Once all of the caulk is removed you must clean the area that is to receive the new caulking, both the tile and the bathtub. Use a quality tile cleaner to ensure that you have removed any and all dirt, soap scum and hard water deposits from the bathtub and tile. Use an old toothbrush to get into the corners.
Rinse the tile and bathtub carefully. Remember that you have removed the caulk that prevents water from going behind the tile and the bathtub, so it is best to use a wet cloth to remove the tile cleaner rather than splashing buckets of water on them!
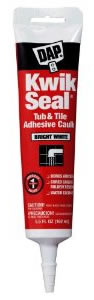
Figure 4 - Tile & Tub caulk and sealant
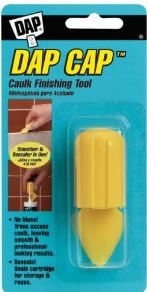
Figure 5 - Caulk tool
Step 3
Make sure that the area to be caulked is 100% dry. Use a hair dryer if necessary to ensure that the area behind where you are planning on putting the new caulking is completely dry. If there is moisture behind the caulk it will prevent it from curing properly.
Step 4
The best caulk to use for your bathtub and tile walls is a caulk that is designed for the purpose and high moisture situations. There are many available and they will be labeled as Tub and tile
caulk, adhesive or sealant. In my opinion the water-based caulks and sealants are the easiest to work with and provide a quality seal between tiles and tubs.
Step 5
Fill the bathtub with water! This may sound silly, but the weight of the bathtub filled with water may pull the bathtub down just slightly and you want the bathtub caulk to be applied with the bathtub at its lowest point.
Step 6
This step is where the experience comes in to play. Applying or laying the beads of caulk. It is best to start in a corner and work your way outwards or towards the center.
Once you have laid a bead all the way around the bathtub or plumbing fixture you must tool the caulk. This forces the caulk in between the bathtub and the tile walls and smoothes the caulk so that water will easily run off. You can use a caulk tool, as shown in Figure 5, or your moistened index finger. Do not smear the surface of the bathtub or the tile with the caulk.