
Pouring your own concrete for a patio, sidewalk, or driveway might save you some money, and maybe even some time, but pouring concrete can be tricky. It’s definitely not a job for the novice do-it-yourselfer. You need to use the right safety gear, pour concrete in the right weather conditions, and prepare the ground carefully beforehand. Follow these steps to pour a concrete slab yourself.
Level the Ground
The first step in laying your own concrete slab is to make sure you have a nice, level piece of ground on which to lay your slab. With any luck, the spot where you want to put your concrete slab will already be mostly flat. If it isn’t, you will have to level it.
You can’t just pour your concrete right on top of the grass, especially not if you want your slab to be level with the grass. You have to dig down far enough that you have room for four to eight inches of gravel substrate, plus the thickness of your concrete. To begin preparing the spot, remove the sod and topsoil, then move soil around until the space is completely level. If you’re moving more than a couple of inches of soil, you might want to rent an excavator. Use a 48- to 72-inch level to ensure that the ground where you plan to pour your concrete is perfectly flat. Once you have leveled the ground, use a hand tamper to compact the soil.
Lay Your Gravel Substrate
Now you can lay your four to eight inches of gravel substrate on top of the soil. Make sure the substrate is level and tamp it down with the hand tamper.
Build Your Concrete Form
Once you have put down your gravel substrate, you can build the concrete form. The form will hold your concrete in shape as it cures, but concrete can easily push the boards of a form outward, so your form needs to be sturdy. Use boards wide enough to accommodate the thickness of the concrete slab you want to pour. One-by-twelve planks should be thick enough. Cut planks to the width of the slab and use a mason’s line to make sure the edges of the boards are level. Nail two-by-four stakes along each side plank at one-foot intervals, then brace those stakes with lengths of two-by-four nailed in on the diagonal. Make sure all sides of your concrete form are level. If you’re trying to create a square or rectangle slab, measure the width of the form across both diagonals to make sure they’re equal.
Add Mesh or Rebar for Reinforcement
If your concrete slab is going to bear a lot of weight, add wire mesh or rebar to reinforce the slab. You can lay wire mesh down on top of your gravel substrate to reinforce the slab, or create a rebar grid on top of the gravel.
Check the Weather
Weather conditions have to be just right for concrete to set properly. If it’s too cold, the water in the concrete mix will freeze, causing cracks. If it’s too hot, the water will evaporate before the concrete finishes curing, which can weaken it. You want cool weather for laying concrete – about 60 degrees Fahrenheit is ideal.
Mix and Pour the Concrete – Quickly!
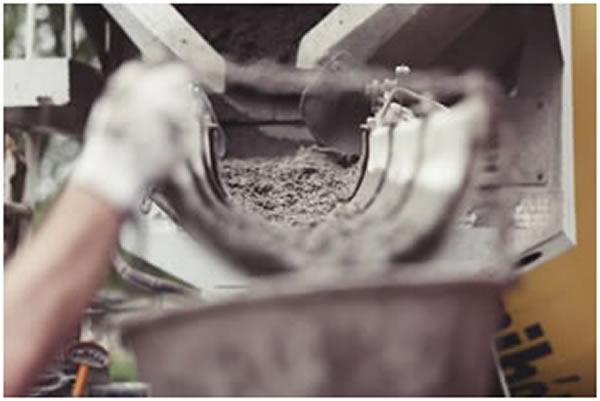
Ready mix concrete that you can buy in bags at your local home store makes it easier to mix and pour concrete at home. You can rent a concrete mixer or use a shovel and a wheelbarrow to mix your concrete.
When you’re working with concrete, make sure to wear the proper safety equipment: rubber gloves, goggles, rubber wader boots, long sleeves and long pants. Concrete can cause chemical burns to the skin, so you don’t want to get it on you. If you do get some on you, stop working, remove any concrete-soiled clothes, wash your skin, and put on clean clothes before returning to the job.
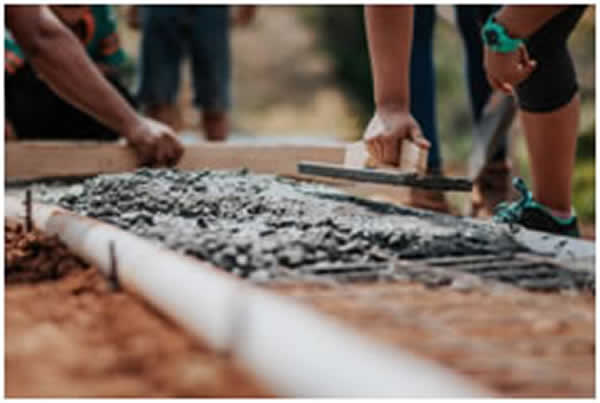
Mix your concrete in a wheelbarrow and pour it right away. You want all of your concrete to be poured at the same time so it cures properly without cracking. If you’re going to be pouring a lot of concrete, it’s worth it to order concrete in a mixer truck. If you’re using ready mix concrete, make sure you’re able to mix enough of it to fill your whole concrete form at once. If you can’t fill the whole form at once, use additional boards to divide the form into sections and remove the dividing boards as you go.
Smooth the Concrete Surface
Once you’ve poured your concrete, use a screed board to smooth out the surface. A screed board should be long enough to stretch across the entire slab of concrete. Use the edge of the board to level out the concrete, flush with the top of your concrete form. Get someone to help you by moving the concrete around as needed while you screed.
Once you have screed the concrete, you can use a bull float to smooth it out further. Push the bull float over the surface of the concrete, keeping the leading edge lifted up. Pull it back towards you, keeping the edge closest to you lifted up. Make three or four passes with the bull float.
Round the Edges
When the concrete has dried a little, you can use an edger to round the edges inside the form. The edger should round the concrete to a depth of about ⅛ of an inch. If it’s sinking deeper than that, let your concrete cure a little more before finishing.
Add Grooves
Grooves allow your concrete to expand and contract with the weather, without cracking. Once the concrete has cured enough to support your weight, it’s time to insert grooves. Use a groover to make grooves in your concrete slab about every ten feet. You can use a two-by-four and a mason’s line to keep your lines straight.
Finish the Concrete Surface
For a really smooth finish, you can use a foam pad to kneel on your partially cured concrete and smooth it with a magnesium float. However, smooth concrete can be slippery when wet. Many people choose a broom finish or brushed finish instead, because it creates more traction. When you’ve finished adding grooves, sweep a broom over the surface of the concrete gently until the entire surface is slightly grooved.
Let It Cure
Finally, you need to let your concrete cure for a full 28 days. Once it’s done curing, you can seal it. Let the sealant cure for at least a day before walking on it and at least two or three days before driving on it. Now, you can enjoy your new concrete slab!