
When joining pieces of wood or lumber together to make a frame one of the most common methods to secure the joint or connection is to use dowel pins<, as shown in Figure 1.
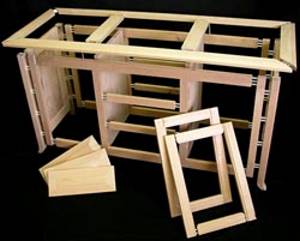
Figure 1 - Cabinet - assembled using dowel pins
Dowel pins and adhesive provide a great deal of holding grip, however in order to obtain a proper joint dowel pins must be positioned properly. If they are not positioned properly, the seams will not be flat, as shown in Figure 2, edges may be out of alignment, as shown in Figure 3 and/or a twist may be created within the frame, as shown in Figure 4.

Figure 2 - Dowel pin out of alignment - seams not flat
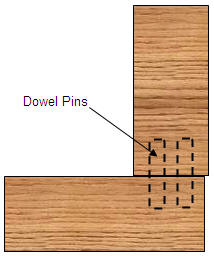
Figure 3 - Dowel pin out of alignment - edges out of alignment
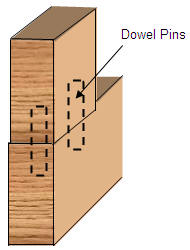
Figure 4 - Dowel pin out of alignment - mating board is twisted
The basic problem is aligning the holes that the dowel pins sit in. You have two separate pieces of lumber and the accuracy of the positioning of the holes will determine the quality of the finished project. It is almost impossible to align the pins using a ruler or square.
To avoid creating the aforementioned situations, it is recommended that the handyman use a conventional dowel jig or at the very least, dowel center transfer plugs. as shown in Figure 5.
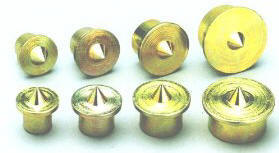
Figure 5 - Dowel center transfer plugs
To use dowel center transfer plugs, you first mark one piece of the lumber to be joined, in the center. Drill appropriate sized holes for the dowel pins, as shown in Figure 6. Insert the appropriate sized dowel center transfer plugs into the holes.
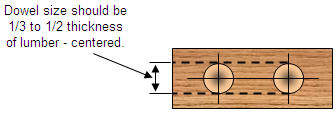
Figure 6 - Holes drilled in wood to accept dowel pin and dowel center transfer plug.
Note 1: The dowel size should be 1/3 to 1/2 of the thickness of the board, see Figure 6.