
Starting in the 60's wall-to-wall carpeting was the in
flooring material (Figure 1).
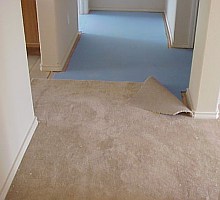
Figure 1 - Removing wall to wall carpeting and underpad
Home decorating has changed and bare floors, especially hardwood is making a comeback. It has been found that wall-to-wall carpeting is difficult to clean and is a haven for dust and other pollutant. With the increase in people who suffer from allergies and other respiratory problems many homeowners are removing their wall-to-wall carpeting and finding beautiful hardwood flooring underneath.
However, the common problem with removal of wall to wall carpeting is that the installers laid down an underpad using a staple gun to hold it in place. Removing the carpeting and then the under pad has left literally thousands of small staples in the flooring beneath.
This is sweat equity at its finest, as removing the staples is not overly difficult, but it is time consuming! It is a home improvement project worth undertaking.
Staples are especially prevalent where two pieces of under pad meet and in corners and room entrances. Staples will overlap, some will be bent over and others are driven in level with the floor, as shown in Figures 2 & 3.
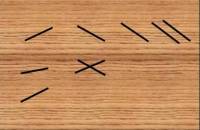
Figure 2 - Staples in hardwood floor

Figure 3 - Staples in hardwood floor
Individuals become very frustrated trying to remove staples without damaging the floor. There is no magical tool that will guaranty to remove every staple without doing any damage to the surface of the floor. Pliers generally do not sit flat as the heads have a slight bevel, making it difficult to grab the staple. Nippers have an inward bevel which prevents grabbing the staple it it is close to the surface of the wood and screwdrivers have a tendency to gouge the floor's surface.
That being said, I have found that there is one tool that will remove 99% of the staples, easily and without any damage.
That tool, which is one of my favorite tools as it always seems to be used no matter what project I am tackling, is the 7 inch, mini pry bar, as shown in Figures 4 & 5.
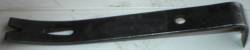
Figure 4 - Mini pry bar
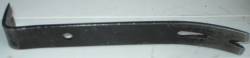
Figure 5 - Mini pry bar
The corner of a beveled tooth on the pry bar is perfect for working under the head of a staple, as shown in Figure 6.
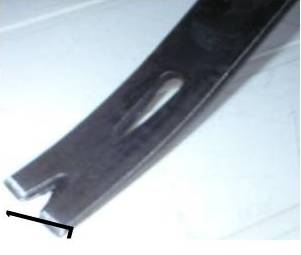
Figure 6 - Beveled tooth of mini pry bar under staple
By holding the pry bar teeth flat on the floor and with a slight twisting motion, back and forth, not up and down, you can work the tip of the beveled tooth under the staple. In many cases both ends of the staple will be raised. In other cases, only the end of the staple where the tooth had penetrated will pull free of the flooring. However, with one end up in the air you can easily grab it with a pair of pliers and pull it out.
The mini pry bar also works extremely well for removing the nail strips that run the perimeter of the room and were installed to stretch the wall-to-wall carpeting.