Floor joists are the lightweight horizontal members that carry the subfloor. Joists are easily differentiated from beams and girders in that they are always spaced relatively closely together. Beams and girders are heavier structural members and are harder to tell apart.
Generally, a girder is heavier than a beam, meaning that if either spans a wider gap or carries a heavier load or supports beams. In buildings that have joists, beams and girders, the joists carry the direct floor loads, transferring these loads to the beams, which in turn transfer the loads to girders, which transfer the loads to the vertical supports or to the foundations.
Few house designs require both beams and girders. For this article we will call the intermediate support for the joists, the girder
. The girder must be strong enough to carry the weight of the joists, which carry the weight of the floor system.
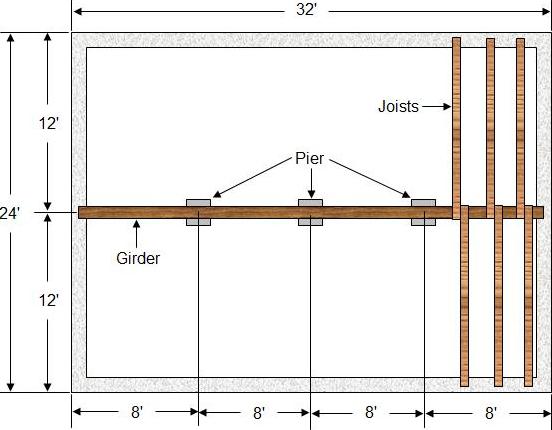
Let us make some tentative design decisions based on a simplified version of a sample house. The width of the house is 24 feet. We divide the span into two parts of 12 feet each; the joists will span this 12 foot distance, as shown in Figure 1.
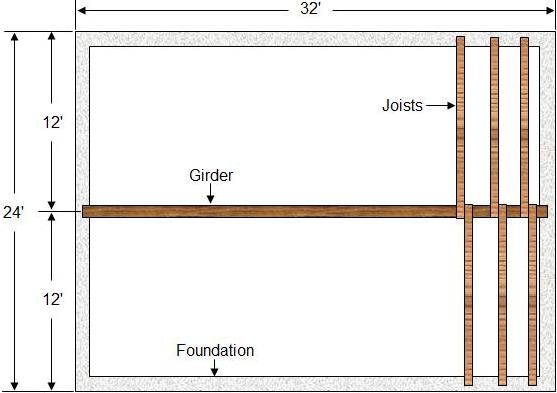
Figure 1 - Calculating girder spans
The length of the house is 32 feet, much too long for a light-frame wood girder to span. In fact the rule of thumb in wood-girder design has established 10 feet as the maximum practical span length for a girder. Anything longer than 10 feet and the cross-sectional dimension of the girder gets too heavy. Since design requirements dictate spans for girders and beams of greater length, we recommend a comfortable maximum of 12 feet for the girder spans.
We can divide the girder span into three parts of 10' 8″ each; or four parts of 8 feet. How we divide the girder’s span will determine how many foundation piers we must construct, two piers, as shown in Figure 2 or three piers, as shown in Figure 3.
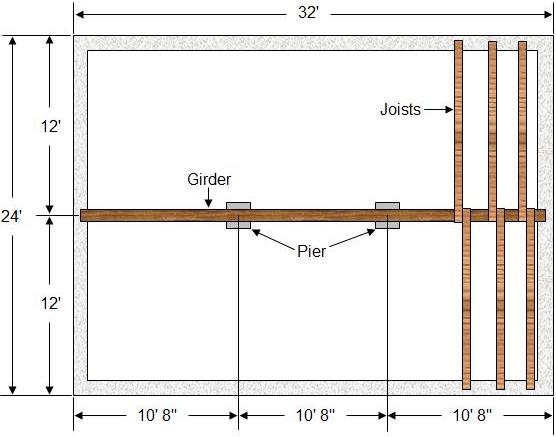
Figure 2 - Girder - 2 pier location