
Nails can only be used in fibrous material hence you cannot use a nail to hold anything to metal or plastic. The reason a nail works is that when it penetrates the fibrous material, the fibers bend in the direction of the penetration and literally grip the nail. It takes more force to remove a nail then it does to drive a nail.

Figure 1 - Common nails
Although nails come in hundreds of shapes, in this article we will discuss the four most popular; common, finishing, ringed and large head nails.
Common Nail:
A common nail, as shown in Figure 2, is used for rough carpentry as the head always shows. Common nails come in sizes from 1 to 4 inches have a smooth shank and a diamond shaped tip. The longer the nail, the thicker it is and the bigger the head. The rule of thumb is that a nail should be three times longer than the thickness of the item that you are attaching. For general 2 x X lumber use a 3.5 or 4 inch nail. 3.5 inch when nailing side-to-side, 4 inch when nailing to an end grain. When nailing two 2 x X pieces of lumber together use a 3.5 inch nail and angle it so that it does not penetrate the second piece of lumber. Nails that penetrate all the way through a board provide less grip than a nail that is buried within the lumber. If a nail penetrates, the penetrating end should be bent over for two reasons, increase the strength of the joint and safety. An improved rough carpentry spiral nail is now being manufactured which provides greater holding power. The spiral nail is twisted and turns as it penetrates the lumber (similar to a screw). Do not use spiral nails for temporary nailing as they are much more difficult to remove than a smooth shank common nail.

Figure 2 - Common nail
Finishing Nail:
A Finishing nail, as shown in Figure 3, is used for finished carpentry as the head can be conveniently recessed and the material filled so that the head does not show. Finishing nails come in sizes from 1/2 inch to 3 inch (the smaller 1/2 inch to 1 inch are know as brads). The length rule does not apply to finishing nails, as it is usually necessary to use a nail that is much longer than three times the thickness of the item you are attaching. When using finishing nails in hardwood or near the end of a piece of lumber, such as a trim or molding, it is always wise to drill a hole in the material being attached, as this will avoid splitting the lumber. The hole should be slightly less than the diameter of the nail. The best way to determine the size is to use your drill box. Remove the drills and try to place the nail in the hole that the drill came out of. Use the next size down from the last hole that the nail would slide into. Remember that it is not necessary to grip the material being attached, as the head, even a finishing nail head, will hold the material in place.

Figure 3 - Finishing nail
Ringed Nail:
Ringed nails, as shown in Figure 4, are used for items such as flooring and drywall. The rings on the nails act in a similar manner to a fish hook, they help prevent the nail from loosing and pulling out.
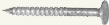
Figure 4 - Ringed nail
Large Head Nail:

Figure 5 - Large head nail
Nails with larger heads (Figure 5) are generally used when the materials being nailed are relatively soft with reference to the lumber that the nail is being hammered into. As an example, the heads on drywall nails are larger as the surface of drywall is paper. Trying to use a common nail to adhere drywall to a stud would see the nail driving past the paper surface and hence would not have any grip on the drywall. A similar situation applies to asphalt shingles where roofing nails are made with larger heads in order to prevent them from driving through the shingle itself.
Many handymen, contractors and suppliers refer to nails as "Penny Size" and this can be very confusing. Penny size refers to the length of a nail not its diameter nor its head. It is therefore necessary to add the words "common", "finishing", or "roofing" to the penny size value.
Table 1 provides a "Penny Nail Size" to "Nail Length Conversion".
Penny Size |
Nail Length |
Penny Size |
Nail Length |
2d |
1" |
10d |
3" |
3d |
1 1/4" |
12d |
3 1/4" |
4d |
1 1/2" |
16d |
3 1/2" |
5d |
1 3/4" |
20d |
4" |
6d |
2" |
30d |
4 1/2" |
7d |
2 1/4" |
40d |
5" |
8d |
2 1/2" |
50d |
5 1/2" |
9d |
2 3/4" |
60d |
6" |