It is a fact of life in decorating, that what is the in thing today will most likely not be the in thing tomorrow and because of that many homeowners end up with outdated room decoration. This is especially prevalent in ceramic and porcelain tile. Colors change from predominantly whites and pastels to the full spectrum of vivid colors and patterns, as shown in Figure 1. The tiles may be in perfect shape, yet the rules of decoration demand that the colors be changed. Replacing a ceramic tile floor or wall can be a very expensive proposition. An alternative is to paint the current tiles.
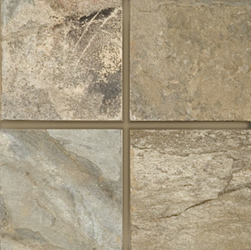
Figure 1 - Ceramic tile floor
Before You Start!
- If your current tiles have a texture, painting over them will not remove the texture, it may soften it somewhat, but they will not be smooth.
- Tiles that are cracked or damaged must be replaced. If you have a cracked or damaged tile, but do not have a replacement you can substitute a tile that has the same finish, but is a different color (white is best).
- Grout that is flaking or needs replacement should be undertaken prior to any painting.
- Allow any new tiles and grout to cure for at least a week before painting.
- These instructions are not for bathtubs, shower stalls, toilets or sinks. If you have bathroom fixtures that need to be repainted you should contract the project to specialists. Painting porcelain fixtures requires special products and equipment and requires a great deal of expertise.
- Secondarily, you should not paint tiles that will be in direct contact with water. As an example, tiles above bathtubs should not be painted if there is a shower for that bathtub.
Starting:
Paint does not adhere well to dirty or glossy surfaces.
- Wash the tile using a high quality tile cleaner, preferably one that has an abrasive in the solution. Aqua Mix NanoScrub Abrasive Cleaner, as shown in Figure 2, is an excellent choice. Use vinyl gloves to protect your hands and safety glasses to protect your eyes and scrub the floor using course steel wool. If you are painting a floor, this is a "get down on your hands and knees project"! Mold and mildew, if present, must be removed from the tile and the grout. Remember to protect any wood surfaces that the cleaner may come in contact with, such as baseboards and kick boards on cabinets.
- Rinse the tile with clean water to remove all of the cleaner.
- Use a power sander (an orbital style sander, as shown in Figure 3, works best) with 220 grit sandpaper to scratch the surface of the tile. Use a couple of layers of masking tape to protect bathtubs, molding and kick plates or walls as orbital sanders have a tendency to bump into objects adjacent to the object being sanded.
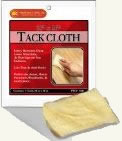
- Remove any sanding dust that may be left on the floor. This is a critical step as any dust that remains will leave surface marks when you are painting. Use a vacuum and tack cloth, as shown in Figure 4.
- A new product on the market, for removing the gloss surface from ceramic and porcelain tile is an etching cream. It's specifications would imply that it will remove the gloss without the need for sanding and hence, will not create large quantities of dust. It is available at Amazon.com, just click on the banner at the end of this article.
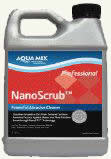
Figure 2 - Abrasive cleaner
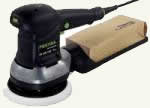
Figure 3 - Orbital sander