
Pier and beam construction is a term that describes a host of various construction techniques. What it has in common is that a column supports the weight of a beam, unlike a house foundation where the entire wall of the home sits on a foundation which sits on a footer and the weight is distributed across the entire base of the foundation, as shown in Figure 1.
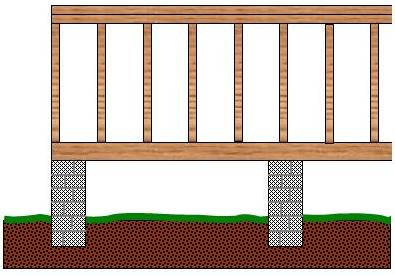
Figure 1 - Typical Pier and Beam Construction
As an example most raised decks on a home use pier and beam construction as the method of support.
The "pier" portion of the term may be wood, poured concrete, cement blocks or even stone. The pier may sit on a concrete footing that sits on the ground or it may be buried below ground.
The "beam" can be steel or wood and in theory could be a cast block of concrete.
The connection between the pier and beam can be created in numerous manners, it can be notched in some fashion or it can use a steel cradle or gusset.
Over time the piers can deteriorate and must be repaired or replaced. As the beam is a key part of holding the structure in position, repair or replacement must be thought out before starting.
Because of the almost infinite number of logistic scenarios there is no one tried and proven method to replace or repair a damaged pier. The following information is a guideline and will have to be adapted to specific circumstances.
The primary key to repair or replacement is the necessity to remove the weight of the structure from the current pier. In order to do this the building must be raised slightly and the weight of the building removed from the pier and moved to a different location.
If the pier on the edge of the building has to be repaired or replaced the structure needs to be supported on that corner, both length and depth. The most convenient method is to place a beam, wood (8" x 8") or steel across the corner and using hydraulic bottle jacks, as shown in Figure 2, take the weight off the pier, as shown in Figure 3.
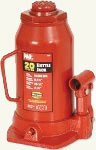
Figure 2 - Hydraulic bottle jack
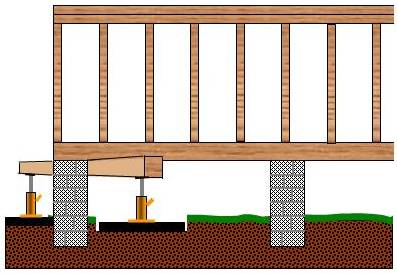
Figure 3 - Temporary support beam under corner of main beam
When placing the steel plates and hydraulic bottle jacks, make sure that you have enough room to dig around the old pier, without shifting the soil underneath the plates in order to make the repairs.
The weight has to be distributed on the surface of the ground. The best method is to use steel plates 4' x 4' or bigger, at least 3/4" thick. If steel plates are not available, three - 8' x 8' at least 8' long, tied together with 2 x 4 lumber across the joints could be used, however, the steel plates are much better. The grass and soft soil beneath the grass should be removed.
There is no need to jack the structure much more than an 1/8" above the pier. An 1/8" should provide adequate clearance for the repair of replacement. You should also be able to capture an 1/8" without damaging any drain, sewage or other connections that run from the building to the ground, that may be raised slightly in the process of jacking.
A small rise also reduces damage that may be done to drywall or plaster. It is not unusual to have cracks appear in walls, especially above doors and windows.
It should be noted that usually the beam is fastened to the pier in some manner. This fastening should be removed prior to commencement of the jacking process.
If you are removing a center pier, you can jack both sides of the beam. It is usually wise to place a piece of 1/2" steel plate between the head of the hydraulic bottle jack and the beam to avoid having the head of the jack push into the beam, as shown in Figure 4.
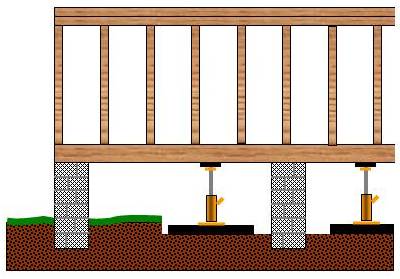
Figure 4 - Jack positions when replacing a centrally located pier
Always be extremely careful when jacking and working around the jacks. The jacks must be installed and remain in a perpendicular position to the beam. Never jack on an angle!
When working with jacks it is always best to place material beside the jack to maintain support in the event that the jack slips out of position, as shown in Figure 5. In the same manner as one would do if working on a car.
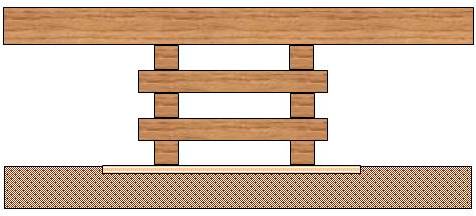
Figure 5 - Temporary support structure for repair and replacement of a pier.
4" x 4" x 3' lumber, built in the manner of a log cabin, works well for temporary support. The temporary support should be placed on a piece of steel or at minimum 3/4" plywood. The ground cover should also be removed so that the plywood rests on solid ground. The temporary support lumber does not have to be nailed or fastened together in any manner. If it is built with an overlap, as shown in Figure 5, where the lumber does not sit on the lower lumber's edge, the structure is sound and will not shift.
Raise the jack about an 1/8" higher than required, build the support underneath the beam and then lower the jack so that the support takes the weight. When it comes time to remove the temporary support use the jack to raise the beam just enough so that the weight is removed from the support structure. Remove the support structure and lower the beam so that it sits on the new pier.