
Different types of stone have always been popular countertop materials. Traditionally, granite and marble have been among the most common picks, thanks to their hardness, durability, and visual appeal. However, quartz has recently become another great material for countertops. Quartz shares similar qualities with traditional countertop stones, but it’s non-porous—making it stain-resistant and easier to maintain.
Installing quartz countertops isn’t too difficult a task. That said, the weight of the material typically means it won’t be a one-man job. Furthermore, there are several considerations to keep in mind throughout the process. Follow these eight steps to get the job done without a hitch:

- Measure The Cabinet Tops
- If you order a quartz slab that’s too big or too small, you may end up wasting quartz, extending the length of your job, and spending extra money. This can all be avoided if you take care during this step.
- Get your measurements as accurate as possible. Grab a measuring tape and measure your cabinet tops. Remember to include spaces for things like sinks if applicable. Add an inch or two to your measurements to leave room for error.
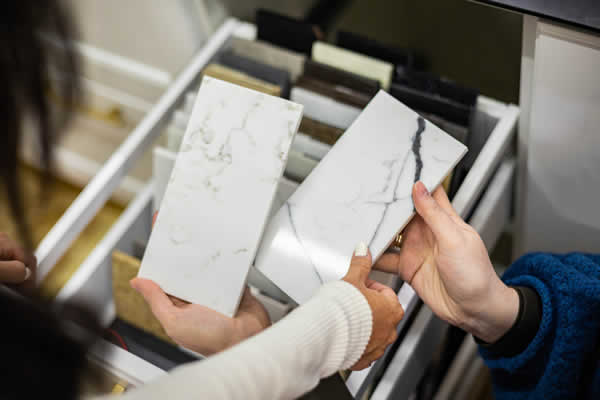
- Select And Order Your Slabs
- Quartz countertops come in an assortment of patterns and colors. You want to choose a color that fits with the aesthetic of the rest of the room.
- Further, you have to choose the style of the edges of your countertop. Rounded, curved, beveled, and squared edges are common choices. Keep unfinished edges at any point where two slabs will meet. This should be communicated to the stone fabricator preparing your countertop slab.
- If possible, visit the warehouse you’re sourcing your quartz from and speak with the stone fabricators. This way, you get to choose which slab becomes your countertop and explain how you want it.
- Get Your Tools And Equipment Ready
- No DIY quartz countertop installation can be done without a few necessary tools. Here’s what you need:
- Level
- Circular saw
- Diamond masonry blade
- Painters tape
- Masking tape
- Level
- Silicone adhesive
- Ledgers
- Measuring tape
- Straight ruler or straight edge
- Screwdriver or drill (for installing sink)
- Pencil or fine marker
- Additionally, you should always wear a dust mask and safety goggles at a minimum. Cutting quartz (or any other stone) generates fine stone dust particles—you don't want to inhale these. You may also want to wear gloves.
- Prepare The Area For Installation
- Prepare the area before you start the installation. First, disconnect and remove the sink. Next, remove any existing countertop or surface, leaving only the cabinets behind. Check these with a level and fix any unlevel areas with wooden shims or ledgers.
- It’s a good idea to ensure the surrounding area is fully prepared, too, especially if you’re doing a complete kitchen revamp. Have any painting, plumbing, and electrical work completed before the countertop comes.
- Dry Fit Before Installing
- Once the area is prepared and your countertop has arrived, it’s time to check how well they fit your cabinet tops. Quartz countertops are generally quite heavy, so this will probably require more than one person to do.
- Carefully dry fit the slabs on top of the cabinet, exactly where you intend to install them. For multiple slabs, check that they fit together as they should. Ensure all slabs fit seamlessly onto your cabinets.
- Cut Your Slab To Shape
- After the dry fit, the quartz may need to be cut to fit the space perfectly. If you’re lucky, you might not need this step at all (but you probably will). Measure exactly how much you need to cut and mark your cut lines precisely. To do this: don’t use a pencil or marker directly on the quartz. Instead, lay down some painters or masking tape over where you’ll cut and mark the cut lines onto the tape. Ensure they’re straight with a ruler or straight edge.
- Place cut lines on the top and bottom of the slab. Before cutting, ensure everyone is wearing a dust mask and safety goggles. Then, set your circular saw to half the height of your quartz slab and put in the diamond masonry blade. Cut into the top by carefully following the cut lines, holding the saw and slab steady. Do the same thing on the bottom.
- Install Ledgers For Extra Support
- This isn’t essential, but it’s advisable. Quartz countertops are heavy and may weigh down on your cabinets. If you want to add extra support, install some ledgers. These will help boost the sturdiness of your cabinet tops.
- Install The Countertop
- Place some painter’s tape around the sides of the cabinet, just below the edges. This is to protect the cabinet from any leaking adhesive.
- Start by applying silicone adhesive to the cabinet tops. Apply ‘beads’ of silicone to the tops, between six and twelve inches apart from each other. These will flatten and spread under the slab’s weight.
- Next, install your slabs while the adhesive is still wet. Carefully lift them (with help) and put them into place on the cabinets. If there’s a sink, install that too. Remove the tape before the silicone dries.
- Finally, seal any visible seams between slabs with silicone adhesive. Place painter’s tape on either side of the seam, apply your adhesive, and then remove the tape.
- Remember to allow the adhesive to set before putting anything on the countertop. How long this takes should be stated on the box or tube it comes in.
Conclusion
If you’ve followed the eight steps described in this post, you should be left with a new, stunning quartz countertop installed in your kitchen. Installing quartz countertops is a rewarding and achievable project for nearly anyone. If you maintain and clean it regularly, it’ll serve you for years to come.