
If you are installing a concrete garage floor, patio, driveway, sidewalk or support columns you should consider using reinforcing bars, as shown in Figure 1, or as they are termed in the industry "rebar", throughout the slab. Reinforcing bars help to hold the concrete together and will prevent cracks from forming.
Check out these construction services.
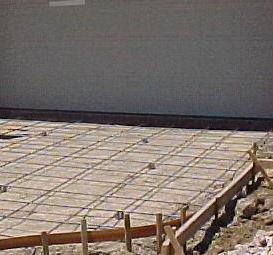
Figure 1 - Rebar laid for a concrete driveway
Of course, like most construction products, rebar has its own size terminology. Table 1 presents the standard rebar sizes and their weights.
| Table 1 - Rebar Sizes & Weights | |||
Industry Size Designation |
Metric Size Designation |
Diameter (inches) |
Weight (lbs/ft) |
3 |
10 |
3/8 |
0.376 |
4 |
13 |
1/2 |
0.668 |
5 |
16 |
5/8 |
1.043 |
6 |
19 |
3/4 |
1.502 |
7 |
22 |
7/8 |
2.044 |
8 |
25 |
1 |
2.670 |
9 |
29 |
1 1/8 |
3.400 |
The diameter in Table 1 is a nominal number and is measured at the narrowest points on the bar.
One of the most common questions is;
"What size rebar should I use?"
For driveways and patios a #3 rebar which is 3/8 inch in diameter should be sufficient for the purpose. If you are constructing walls, piers or columns I recommend the use of #4 (1/2 inch) rebar. For building footings I would use a #5 (5/8 inch) rebar.
The installation of the rebar is critical for the success of the overall project. Rebar should be placed evenly throughout the project. For a flat slab, such as a driveway, consider placing the rebar in an 18 inch grid spacing, keeping the edge rebar at the same distance from each side. For a patio you can use a grid spacing of 24 inches.
As an example, if you have a 10 foot driveway, you would start the first row of rebar at 15 inches from the edge and then lay another 5 pieces of rebar at 18 inch centers. This would leave 15 inches from the opposite edge, as shown in Figure 2.
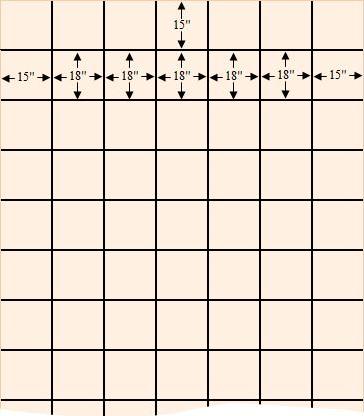
Figure 2 - Rebar installation grid
To create a strong grid of rebar, it is important that where ever two or more pieces or rebar cross, that they are joined together as shown in Figure 3, with rebar tie wire, as shown in Figure 4.
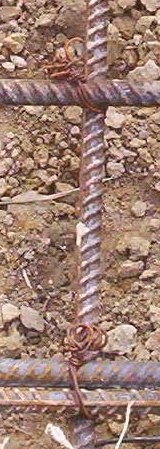
Figure 3 - Rebar tied together at joints
A special rebar tie wire hand tool, as shown in Figure 5, is available to aid in tightly twisting the wire around the rebar.
Rebar should not be joined at the corners, and because of this rebar manufacturer's provide rebar that is bend at a 90 degree angle, as shown in Figure 6.

Figure 4 - Rebar tie wire
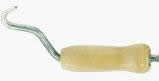
Figure 5 - Rebar tying tool
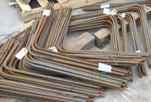
Figure 6 - 90° bent rebar
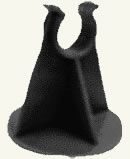
Figure 7 - Rebar supports
The rebar should end up in the middle of the slab, not at the top or at the bottom. The rebar can be placed on pieces of bricks or stones, as shown in Figure 1, to hold it above the ground when the concrete is poured. Then pulled into position using a rod with a hook on the end to grab the rebar.
As an alternative to using bricks or stones to support the rebar during the concrete pour, you can use inexpensive rebar supports, as shown in Figure 7, that are specifically made for the purpose of holding the rebar off the ground during the concrete pour.
Additional information on building concrete slabs, patios, driveways, and sidewalks.