
Additional information on roof trusses.
Truss uplift is a strange almost unexplainable occurrence that happens in new homes when the bottom of the trusses separate from non supporting walls during winter months as shown in Figure 1.
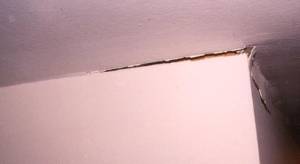
Figure 1 - Ceiling and wall damage caused by roof truss uplift
This separation breaks the taped joints between ceiling and wall drywall as shown in Figure 3. The wider the span of the truss, the more often the problem seems to present itself.
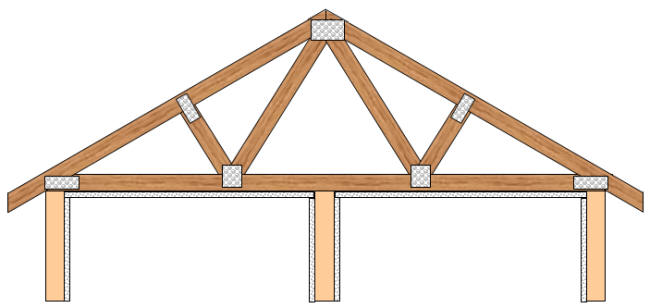
Figure 2 - Roof truss in normal position.
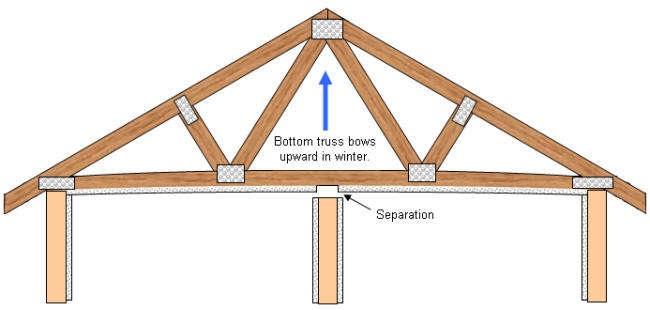
Figure 3 - Roof truss in uplift
position.
There are numerous suppositions on why this occurs. The most accepted of the suppositions is: Because the bottom member of the truss is usually buried in insulation and the upper members are cold, that the expansion of the bottom member is greater than that of the upper members, the resultant is that the bottom member of the truss bows upward.
Whatever the reason, the problem is real and at the time of writing this article there are no methods available to stop the truss uplift action from occurring.
The alternative is to stop the truss uplift action from having any effect on the ceiling and wall drywall joints that exist throughout the home. Truss uplift is not a structural problem!
There are two methods that can be used to prevent the appearance of ceiling / wall cracks and separation:
- The addition of a piece of 2 inch molding attached to the ceiling, running parallel to the wall see Figure 4. This allows the ceiling to move freely while the molding slides on the wall and hides any gap that may appear. This is the easiest method to hide the problem.
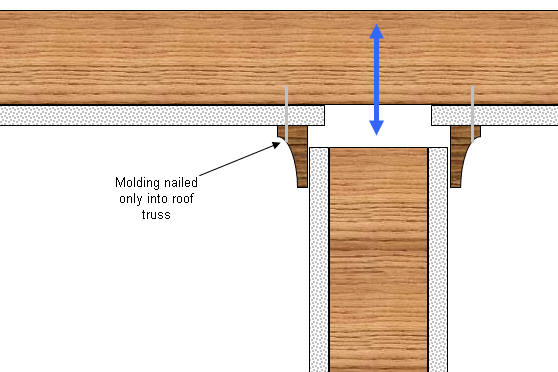
Figure 4 - Using molding to hide truss uplift.
- The second method is to give the ceiling drywall an alternative structure for support that is independent of the roof trusses. This can be accomplished by laying ceiling joists beside the roof trusses, but not tying them in any manner to the roof trusses.
This can be a very difficult method to actually implement. The pieces of lumber used to run parallel to the truss must rest on support walls and hence must be slightly longer than the room is wide. The logistics problem created is how to get a piece of lumber into the attic, that will become the ceiling joist, that is longer than a room is wide.
If wiring, plumbing or HVAC run through the roof trusses, it can complicate the issue of positioning new ceiling joists.
Depending on how serious the roof truss uplift is, one method to consider is to open up the ceiling along the wall line and insert the new ceiling joist into position. This requires replacing a portion of the ceiling drywall and in most cases will require that insulation be moved around in the attic.