
Step 1:
Apply the roofing felt on the roof, cutting a hole for the vent pipe. Apply the last row of shingles that is just below the vent pipe as shown in Figure 1.
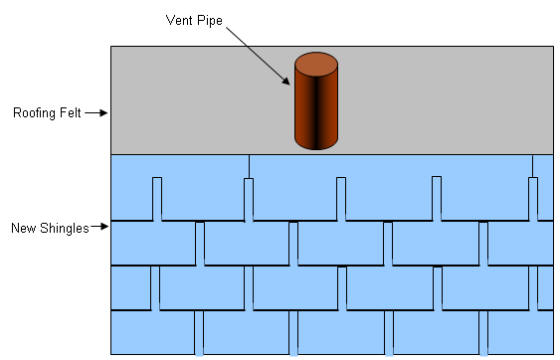
Figure 1 - Install shingles just below vent pipe
Step 2:
Continue the next row of shingles cutting a hole for the vent pipe. Use some asphalt roof cement under the cut shingle and around the vent pipe, as shown in Figure 2.
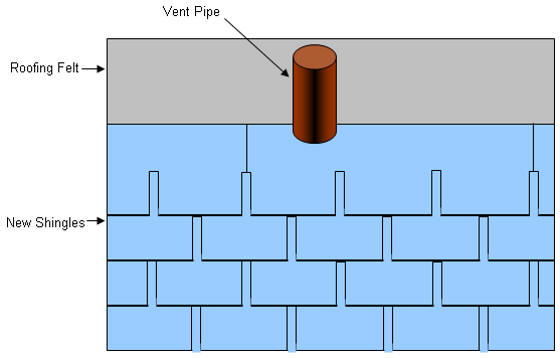
Figure 2 - Cut shingle to fit over vent pipe
Step 3:
Apply a generous amount of asphalt roof cement around the vent pipe and place the vent pipe boot over the top of the pipe, covering the last course of shingles, as shown in Figure 3. If necessary, drive a couple of nails into the pipe boot on the top edge, in the corners. The asphalt cement, and the nails from the next course of shingles will hold the boot in position and seal it.
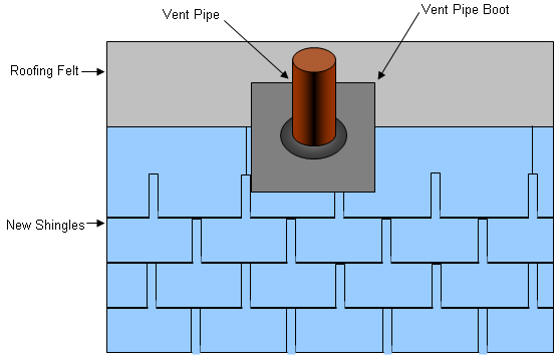
Figure 3 - Install flashing - vent pipe boot, over vent pipe