
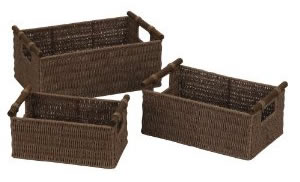
Figure 1 - Storage baskets
Placing baskets on shelving is one of the most efficient methods of storing many common household items such as:
- Toys and games
- Folded sweaters and shirts
- Underwear and socks
- Sewing and craft supplies
- Office supplies
Anyone with basic handyman skills can easily install the wire shelving, as shown in Figure 2, brackets and supports that will support and supply a spot for the baskets.
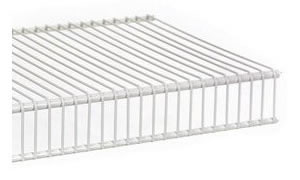
Figure 2 - Wire mesh shelving
It is best to choose your basket storage bins before buying the wire shelving and associated hardware so that the shelving can be installed to suit the basket sizes.
There are hundreds of different styles of baskets and they come in a host of colors, patterns and materials.
Selection of storage baskets.
Determine where you want to place your storage bins and measure the length of the wall space available. Usually the storage bins are in a closet, but it doesn’t have to be that way. They can be mounted on any vacant wall space.
Measure the width of your storage bins and multiply by the number of storage bins you want on each shelf, and then add 3 inches. The 3 inches is to allow space between the storage bins and at the end of each shelf so that the storage bins move off the shelves easily.
As an example if you wanted 3 storage bins on each shelf and each storage bin was 18 inches wide the calculation would be 3 x 18 = 54 + 3 = 57. The length of the shelf would be 57 inches.
The wire shelving is generally available in white and silver. Choose storage bin colors which will go well with the other colors in the room. This will make the storage bins blend into and complement the room.
If you cannot find storage bins in the colors you want, you can always spray paint wicker storage bins, to any color that will suit. You can also decorate the storage bins with synthetic flowers, cloth, plastic leaves or other types of ornaments that suit the room and the people how spend their time in it. Remember that this should be a fun and can easily be a whole family craft project.
You will need some tools in order to mount the wiring shelving to the walls:
- Electric drill
- Level
- Pencil
- Measuring Tape
- Screws and anchors often come with the wire shelving.
The materials that you will need are:
- Wire shelves
- Support arms for the wire shelves.
Note: Always purchase the support arms and the wire shelves from the same manufacturer as the wire shelves made by one manufacturer will be slightly different than those made by another and in most cases the support arms made by one manufacturer will not work on wire shelving made by another manufacturer.
Before you install the wire shelving you will have to make a couple of decisions.
- In most cases the shelves will be narrower than the length of the wall and you will have to determine the horizontal position of the shelves relative to the walls.
- You will have to determine the height of the shelves from the floor. Usually this decision is based on who you want to have access to the storage bins. If the intent of the storage bins is for children to put their toys away, the storage bins must be at a height that the children can reach. If the storage bins are going to hold sewing supplies, you probably want to place them at a height that your children cannot reach.
Note: Always follow the manufacturer’s instructions for the installation of the wire shelving.
Installing the wire shelving.
- A helper comes in handy to allow you to visualize the project before you start drilling holes in the wall. Place a couple of baskets on a shelf and have the helper hold it in position so that you can visualize what it will look like when complete. If a helper is unavailable sit the shelf on a couple of chairs or boxes.
- Leveling the shelves is very important. If the shelf appears to be on an angle it will stand out badly. Use a bubble level to ensure that the position of the shelf brackets is level with the floor.
- Screw the support brackets into the wall. Use plastic anchors if you are working with drywall or sheetrock.
- Place the wire shelf on top of the support brackets.
- Place one of the storage bins on top of the shelf and measure between 3 and 4 inches from the top of the storage bin. This is the position for the second shelf. You need the extra space between the storage bins to allow the storage bins to slide off the shelf easily without catching on another shelf.
- Continue the process of adding shelves until you have installed the necessary number of shelves.