
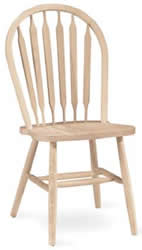
Figure 1 - Wood chair ready for varnishing
Varnish is not a finish that can be rushed. Depending on how many coats of varnish you apply to the piece of furniture or other item, the proper application of varnish can take a week or more.
Note: This article is about the application of varnish. These instructions do not apply to the application of lacquer, polyurethane, shellac or other surface finishes.
Note: This article assumes that the wood to be finished with varnish is free of paint and other surface finishes. This article does not provide instruction on repairing an already varnished surface.
The recommended application method for varnish is with a brush. Varnish will most likely run if it is applied with a spray-gun.
One of the most important rules when applying varnish is to control the ambient temperature in the room where the varnish is being applied. The optimum temperature for applying varnish is 70 degrees F. Maintaining the correct temperature will ensure that the varnish cures correctly. Temperatures below 65 degrees F will slow the curing time down dramatically. At this temperature curing time could easily be weeks. Above 75 degrees F and the curing time is accelerated. This causes the solvent in the varnish to evaporate to quickly which will not allow the brush marks to flow and the bubbles to evaporate and could produce an uneven varnish layer or film.
Note: Because varnish cures slowly, compared to other finishes, it is important that the room used to apply the varnish is dust free and will remain so during the entire varnish finishing process. Always vacuum the room thoroughly before commencing the varnishing project. Do not wear clothes that shed lint and I always recommend the use of a hair net or hat to help prevent hairs from falling on the surface of the varnish prior to being fully cured.
Note: Room ventilation is also important as most varnishes have very strong odors.
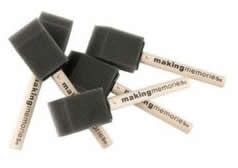
Figure 2 - Foam brushes
Brushes:
Although many articles on applying varnish may recommend the use of high quality natural hair or china bristle brushes for applying varnish it is not necessary and in fact you can obtain equivalent results by using a number of disposable foam brushes, as shown in Figure 2. As well, it saves a lot of time in clean-up, throw the foam brush away after each coat and use a new disposable foam brush for each additional coat of varnish.
Applying The Varnish:
Spit or Sealer Coat:
The first coat of varnish that is applied is called the spit or sealer coat.
When applying varnish as a finish there is no need to use an independent sealing product as the sealer or spit coat. Varnish, thinned down, makes the best spit or sealer coat. By using the varnish as the spit or sealer coat you ensure that you will not have any compatibility problems between products.
The varnish should be thinned down for the initial coat. This allows for greater penetration into the pours of the wood. Thin the varnish down in a ratio of 1 part varnish to 1 part mineral spirits. Use high quality mineral spirits.
I always recommend that varnish be strained through a paper strainer or nylon stalking before application. This ensures that any possible particles that are in the varnish or may have been on the top of the varnish container are removed before it is applied.
Stir the mixture of varnish and mineral spirits. Do not use an electric mixer as this will create a lot of bubbles in the blended products.
Dip the foam brush into the mixture to the level of the bevel on the tip of the foam. Do not wipe the foam brush on the edge of the container. Just allow any excess thinned varnish to drip back into the container.
Apply the varnish to any vertical surfaces first. Where at all possible apply the varnish with the grain. Continually brush out any varnish that starts to run.
Note: Applying varnish to intricately turned wood will most likely cause the varnish to run and to pool in areas. It is important not to apply to much varnish and to continually brush out any varnish that runs or pools. If you are working on the feet of chairs or tables it is wise to have the base of the feet resting on wax paper.
Note: Another trick is to put screws or finishing nails into the bottom of feet or legs so that the base of the foot or leg sits above the floor. This allows you to apply the varnish to the bottom of the feet or legs without having the varnish pool.
The sealer or spit coat will need at least 24 to 36 hours to cure properly before you can proceed to the next step.
Sand the sealer/spit coat with 320 grit sandpaper. Do not allow the sandpaper to become clogged. If it does, use a fresh piece of sandpaper.
Note: If the sandpaper clogs easily it usually means that the varnish has not cured properly. When sanding you should get a very fine white dust.
Remove the dust with a tack cloth. I do not recommend the use of a vacuum cleaner because they generally blow air all over the place and unless you have a very good HEPA filter vacuum cleaner you will end up with a fine dust on the piece of furniture or item that you are finishing. If you have a lot of dust and need to use a vacuum cleaner follow it with the use of a tack cloth.
Note: If you are working with very porous wood you should apply another sealer/spit coat before proceeding to apply the finished coats of varnish.
Finish Varnish Coats:
After you have applied the sealer/spit coat you can start to apply the finish coats. Depending o what you are finishing you will want a minimum of 4 finished coats. Many people apply 6 especially to surfaces that receive a lot of wear such as chairs. You will also want to apply 6 coats if you are planning to "rub out" the surface with wet and dry sandpaper.
Note: To "rub-out" the surface means to enhance the shine or gloss of the finished work.
The finish coats can be applied using non thinned varnish. However I recommend thinning the varnish by 15 to 20%. Use the same blending technique, including the straining as outlined in the sealer/spit coat, just use less mineral spirits. The thinner mixture of varnish will make it flow more efficiently and will also allow more time for any bubbles to dissipate before the surface dries.
Using a new foam brush apply the thinned varnish with the grain where possible. Once the surface is completely covered make one more pass, working with the grain, with the tip of the foam brush over the entire surface from end to end, with a small overlap on each pass. Do not over brush.
Allow this coat of varnish to cure completely.
Use 320 grit sandpaper to sand between coats. Use a light of some sort on the object being finished to ensure that you have removed all the gloss from the surface. Use a tack cloth to remove all the dust and apply the next coat of varnish.
Continue this sequence of varnish application, sanding and dust removal to apply the number of coats you desire.
Note: If you are going to do a “rub-out” wait at least 3 weeks to ensure that the varnish has cured 100%.
Note: Although many people apply a paste wax or liquid polish over the surface it is really not necessary.