
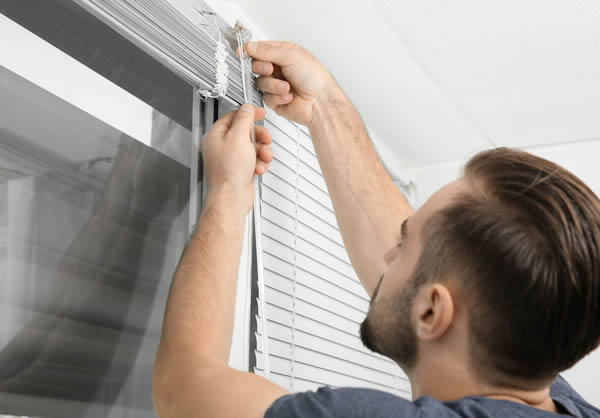
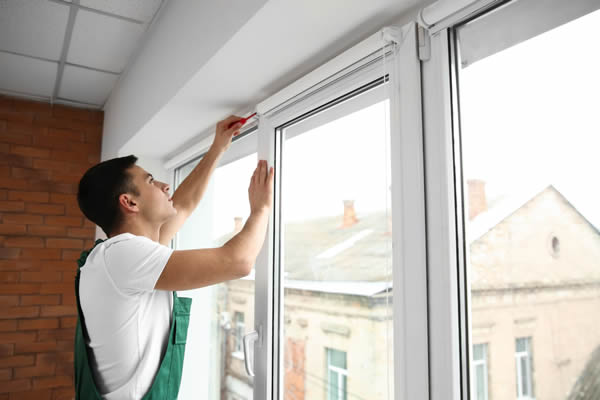
In line with this, you might be wondering how you can install blinds on your own. While there are many types you can install without professional assistance, listed below are the easiest ones to have in your home.
• Drilled Blinds
In most cases, you can have your blinds installed by drilling holes in the wall, inserting plastic screw anchors and then screwing the blinds mounting brackets into the plugs. This will ensure that they’re mounted correctly and will not fall off. You can do this with roller blinds, wooden blinds, Venetian blinds, or practically any blinds that are wall mounted.
Before pulling out that power drill, though, familiarize yourself with a few steps to ensure a successful blinds installation, even prior to the act of drilling per se:
Step 1: Measure And Determine The Mount
Before heading to the store, you need to take proper measurements of all your windows, and not just one, even if they all look the same. Next, assess if windows for certain areas of the house would be better with an inside or outside mount.
When you choose an outside mount, the window and blinds will look larger, illuminating a bigger area. Go outside and measure along the edges of the window case from there.
For an inside mount, measure the edge where the glass meets the case and on all four sides of the window case as well. If there’s a difference in the numbers, use the smallest measurement to ensure that it could fit perfectly inside.
Step 2: Purchase The Blinds
Purchasing the set you prefer now becomes easy when equipped with the proper measurements. You could choose from different kinds of blinds and work with the type of mount you like.
Step 3: Mark Spots For Your Mounts
Upon opening the packaging, make sure that all parts are complete to ensure that there will be no future fuss upon installing your new blinds. If there’s an instruction manual provided, strictly follow it.
When marking for the outside mount, hold the blind and then place it just above the window, ensuring that the bottom part is where you’ve measured your blinds’ size. After properly placing and aligning them, make your mark on the rail with a pencil and provide a ¼ inch mark on each end of the rail to allow space for the brackets.
If you’re making marks for the inside mount, place the headrail inside your window’s casing and make sure that it’s adequately leveled. Mark just below the headrail on each end.
Step 4: Mark Your Brackets
Along with marking your rails, you should also mark where to place your brackets. Position the brackets inside the pencil marks you’ve just made on the sides. The bracket door should be the one facing the room and have the holed side match the window.
Draw your marks on the holes of the brackets using your pencil. For better attachment, you should drill two holes. For maximum safety, you can choose to have them drilled diagonally so that it can hold well.
Step 5: Drill
Upon drawing your mark, you should be able to drill the holes for the screws and have the brackets attached to it as well. Only use the appropriate screws, anchors, or plugs for the kind of walls you have in your house.
Step 6: Install The Headrail And Valance
After you’ve successfully put up the brackets in place, you should attach the valance next. The valance helps keep your headrail more decorative rather than metal-looking.
Rest it at the top of the valance clips to find its position. When you’ve settled on it, gently press down the valance so the valance clip snaps into it, allowing it to be secured in place.
After attaching them, place the headrails into the brackets and have them closed shut after successfully placing them.
Step 7: Install The Blind Wand
If your blinds come with a wand, now is the best time to attach them. You should insert the wand’s end into the hook where it’s located.
• Attaching Blinds
If you’re hesitating on drilling holes into your walls for installing blinds, you could avail of those that don’t require any drilling at all.
Here are some of those options along with quick ideas on their installation:
- Magnetic Blinds – If your window comes with a metal bracket, magnetic blinds are going to be easy to install. But if they’re made from standard wood, you only need to attach three brackets to your window and attach the blinds to them.
- Tension Rod – When purchase a tension rod, get one that’s larger than your inside window size. When attaching it to the window, hold it close so that it’ll release its full length inside your window, allowing it to push through the ends.
- Command Strips – This kind acts like a stronger double-sided tape for your wall. Make sure to attach these strips securely to the blinds before placing them on the wall. For a better hold, you could add extra glue to ensure that it’ll stay in place
- Self-adhesive Blinds – This type works like the command strips kind, except these blinds are usually made of paper. However, you could trim them perfectly to your window’s size. This type is ideal for those who frequently clean their windows.
Conclusion
Attaching your blinds properly is essential to ensure the safety of your family, especially when you have kids around. Doing so helps you avoid any potential injuries or accidents caused by window blinds falling off their places.
Along with this, having your blinds properly attached ensures that your privacy is met and will be kept in place. You’ll also be able to protect yourself from the sunlight peeping through your window, which could be too much and might cause your skin to burn, as well as warm up your room during the summer.
Installing your blinds at home by yourself is easy and possible, as long as you follow the right instructions and make sure that your blinds are the right size for your window case.