
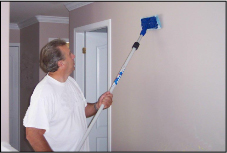
Figure 1 - Cleaning walls
Most painted surfaces can be cleaned, however there may be some paint removal during the process.
The high and semi-gloss paints will survive washing much better than the flat and satin finished paints.
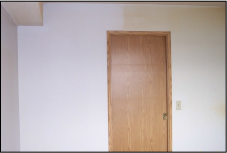
Figure 2 - Comparison - wall cleaned and wall not cleaned
Some homeowners are amazed by the results obtained. Dirt and grime that adheres to walls and ceilings generally does so in a very slow process - years, and hence we do not see the changes to the paint color and gloss occurring.
Because damage can occur when washing walls and ceilings, it is important to test an area with the cleaning method you are planning to use in a non conspicuous place such as behind a sofa, chair or bookcase. If after testing the painted area the paint has not changed color and the finish has not deteriorated it can be assumed that it is safe to clean the entire wall surface in the same manner as the test area.
Remember that walls and ceilings are generally not painted with the same type of paint. Just because no damage occurred to the walls when performing your test does not mean that it is safe to wash the ceiling without testing the ceiling paint in a corner of the room.
No one likes to use chemicals in their homes if they do not have to. Hence, start your wall cleaning with a solution of water and dish washing detergent. If this is not strong enough you can try household cleaners that specifically state that they are safe to use on painted surfaces.
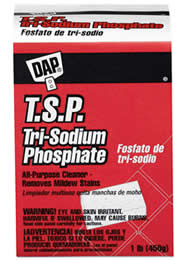
Figure 3 - Tri-sodium phosphate (TSP)
For very dirty walls use a stronger alkali cleaner such as TSP (tri-sodium phosphate) or an ammonia based detergent. The mixing proportions should be 2 tablespoons to 1 gallon of warn water (do not use hot water). The stronger the solution, the more likely you are to remove some of the paint.
No matter what cleaning solution you eventually use, always rinse the walls and ceiling with clean water.
If you are using a commercial cleaner, always follow the manufacturer's instructions!
Always read the safety statements and know what to do if you should accidentally ingest or get the cleaning chemical in your eyes!
Wall & Ceiling Cleaning:
- Always dust and vacuum the wall or ceiling area to be cleaned before washing. This removes any dirt and grime that is not fixed to the ceiling or wall surface.
- For best cleaning use 2 buckets. Use one bucket for the cleaning solution mixture and the other bucket for rinsing. Have a separate cellulose sponge (Figure 4) in each bucket.
- When cleaning walls and ceilings the cleaning solution will splatter on other items in the room and on the person doing the cleaning. Cover or remove all furniture in the room, Cover flooring with plastic drop cloths.
- Always wear the correct clothes and safety protection:
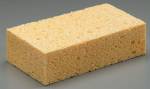
Figure 4 - Cellulose sponge
- long sleeves and long pant legs,
- rubber gloves
- safety goggles
- It is best to wash the walls from the bottom up. If the cleaning solution is allowed to run down wall area that has not been cleaned it may leave streaks that are extremely difficult to clean.
- Let the cleaning solution do the work. It should not be necessary to apply a lot of brut force on the sponge to remove the dirt and grime. Rubbing the cleaning solution to hard will remove and cause damage to the paint finish.
- Completely clean one area at a time, approximately 2 feet square, this includes rinsing that area. Proceed with washing an adjacent area. If two or more people are involved in the project, they should not start at opposite ends, but it is best if one washes and the other rinses and that they work adjacent areas. It is not uncommon that one individual will apply more pressure to the painted surface than another and there will be a difference in the paint color and finish between the work done by the two individuals.
- Dry the areas after rinsing, using absorbent clothes and/or towels. Do not rinse these towels in either the cleaning solution or the rinse buckets.