Figure 1 - Remodeled basement living space
Measure the width of the wall at the bottom, middle and the top.
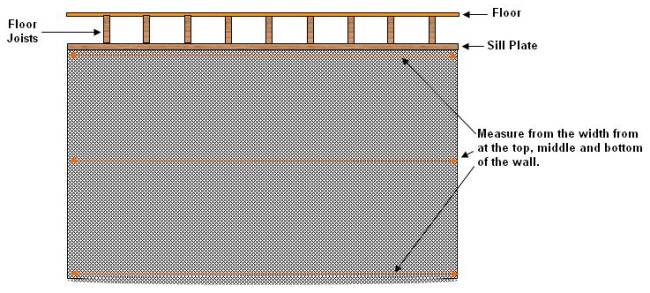
Figure 2 - Measuring the width for the installation of a stud wall
Using the shortest height dimension and the smallest width dimension you can proceed to construct the wood stud wall frame flat on the floor.
The corners of the wood stud wall frame for a basement wall is built differently than a wall that you would construct for a new home or an addition. You only use one top plate rather than two and you frame the corners differently as there is no need to provide framing support for outside wall material.
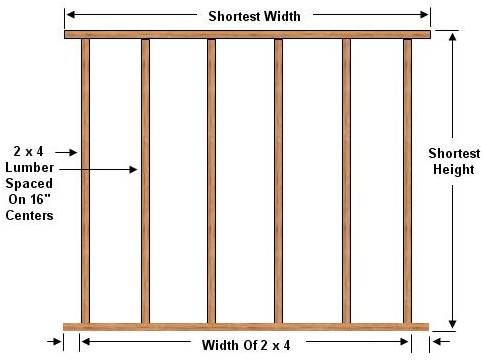
Figure 3 - Constructing the wood stud frame
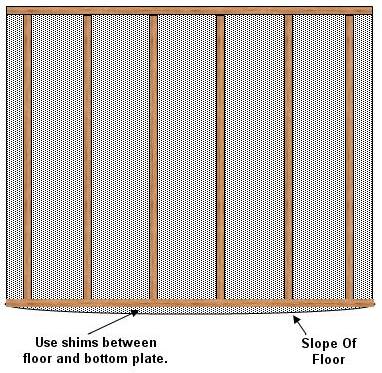
Once you have constructed this wall, place it into position, by angling the top into against the floor joists and if necessary using a sledge hammer to tap the bottom into position. The wall should be tight against the highest part of the floor and the floor joists. However, you do not want it so tight that you raise the floor joists or bow the 2 x 4 lumber. Nail the upper plate of the wall to the floor joists.
The bottom of the wall will not be flush to the floor, due to the slope of the floor, across its length. Use shims every 16 to 24 inches under the lower plate of the wall to tighten it to the floor.