Demolition is the area where many home improvement handymen make their biggest mistakes. Demolition is part of a home improvement project and requires as much planning and thought as the finished project itself.
By performing an investigation of the area to be demolished and then taking into consideration what has been identified, one can save a lot of time, effort, money and heartache.
As an example. A wall that currently separates two rooms is to be removed in order to make one large room.
The items that have to be considered and investigated are:
- Is the wall a supporting wall? Enter the attic and check to see if the end of ceiling joists or rafters rest on the top of the wall. If the wall is not on the top floor, check to see if the upper floor has a wall directly above the wall that you are planning on removing and then check the attic to see if joists or rafters are resting on that wall.
- In the case where there is an upper floor you must ensure that the upper floor’s floor joists do not rest on the wall that you are planning on removing. The only way to do this is to cut an inspection hole in the ceiling and take a look. If any ceiling beams or floor joists rest on the wall that you are planning on removing you must figure out a method to support the beams or joists during demolition and you must install a suitable header and support columns to take the weight when the wall is eventually removed.
- Look for the possibility of wires running through the wall. If there are electrical switches and outlets on the wall you will have to reroute the wiring. Remember that it is unlikely that wires will terminate at the electrical device they will most likely continue on to other outlets, switches and lighting. If there is access from below, such as an unfinished basement, you can follow wires to ensure that none appear to be heading up and into the wall to be removed.
- Look for the possibility of plumbing, hot and cold water, drain, vent pipes and air ducts. If this is a top floor then the only plumbing that might be in a wall is a vent pipe.
- Are the ceilings and floors in both rooms at the same height?
Invest in proper safety equipment, at a minimum:

Safety goggles,

Safety boots

gloves.
If you are working with plaster or drywall then a dust mask is critical.
Predetermine what you are going to do with the material that you demo. Don't forget the safety aspect, throwing it in the backyard where the kids play, is probably not a wise idea. Remove or flatten any nails that protrude from demolished lumber, at the time that you remove it. Leaning glass or windows against walls that are not protected from wind will result in a pile of broken glass.
Clean the site regularly, it is much easier and safer to work in an organized environment then an area that is cluttered with demoed material and tools.
Try to seal off the area that you are working in to prevent dust from spreading throughout the home. This can be done by hanging plastic sheeting over doors. If you have a central air heating or air conditioning system, cover return ducts so that dust does not enter the system and clog and damage air handling equipment. Drywall dust is extremely abrasive, if it gets into the motor bearings of your air handling equipment it will destroy the motor.
Invest in proper demolition tools. Depending on the project this may include:
Sledge hammers. Do not use your $35.00 hammer for demo, it wasn't made for demo work.
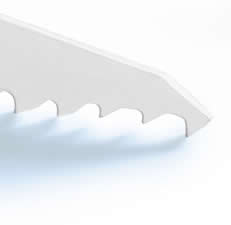
One of the most common tools used in demolition is a reciprocating saw. Special saw blades, for reciprocating saws, have been designed specifically for demolition work – primarily nails in wood, as shown in Figure 1.

Figure 1 - Lenox T2 reciprocating 656R saw blade designed for demolition
Some of these demolition blades have a plunge cutting tooth design, as shown in Figure 2, which allows the operator to cut into walls without having to pre drill access holes.