
Using the router to create the rabbit on the inside edge of the glass doorframe will leave round corners on the inside, as shown in Figure 17.
These corners are easily removed with some care, patience and a very sharp chisel.
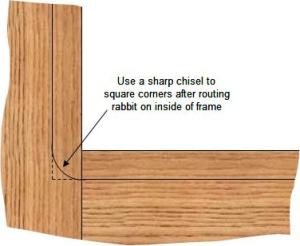
Figure 17 - Use a sharp chisel to square corners after routing rabbit on inside of the glass doorframe.
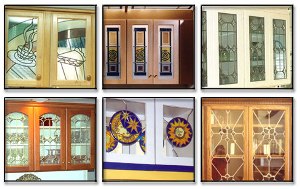
Figure 18 - Stained glass kitchen cabinet doors
If you are using hinges that require rabbits or blind holes in the doorframe (needed for euro hinges) and knobs or pulls that require holes, the holes and rabbits should be made now.
Drilling holes and making any necessary rabbits at this time will prevent any accidental damage to the glass.
Additional information on:
The glass for the doors can be plain, fogged or stained. A few samples of stained glass cabinet doors are shown in Figure 18.
Measure the inside dimensions of the doorframes including the rabbits, as shown in Figure 19.
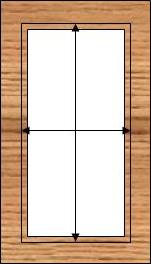
Figure 19 - Measuring cabinet doorframe to determine glass size

Figure 20 - 3/8″ quarter round molding

Figure 21 - Manual brad nail gun
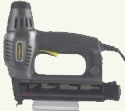
Figure 22 - Electric brad nail gun
Always remember to measure twice!
Deduct 1/16 inch from both the height and width and this is the measurement for ordering the glass from your local glass retailer.
You will want to apply some sort of finish to the cabinet doorframe. It could be paint, stain, and/or polyurethane. Now is the time to paint the doorframes so that you can conveniently paint all of the surfaces without getting paint on the glass and any unpainted rabbit surfaces may be visible through the glass.
If you have made any rabbits or holes for hinges, you may wish to tape off those areas to avoid filling them with paint and by doing so making the holes or rabbits to small for the hardware.
Once you have received the glass panels they will need to be installed in the doorframes.
A strip of molding, covering the inside of the rabbit, above the glass, will be used to hold the glass in position and to finish the inside of the cabinet doorframe. Use your router, mounted in the router table, to make the molding. Usually a 3/8 inch quarter round molding will work best (Figure 20), although if you want to make a molding that has more scroll work for decorative purposes, it will work as well.
Paint or finish the molding in the same manner as the doorframe. Inspect the rabbit surface of the doorframe to ensure that there are no paint lumps or other debris, as the glass must fit flush against the rabbit. Any debris left on the surface of the rabbit could cause the glass to crack.
Place some paint or finishing material on the ends of the molding to ensure that moisture will not enter and swell the moldings.
It is best if the inside molding, unless you have chosen to use rectangular pieces of molding rather than quarter round should be installed with 45 degree mitered angles in the corners which will produce the best possible appearance. Rectangular molding can be installed with butt joints.
The molding will be fastened using small brads, do not use any glue! For a 3/8 inch molding a 5/8 or 3/4 inch brad is more than sufficient. As the molding material is very thin it is best to drill a pilot hole for the brad so that it does not split as you insert the brad. If you are constructing a large number of glass cabinet doors you may wish to consider using a manual (Figure 20), electric (Figure 21) or pneumatic brad nail gun. A pilot hole is generally not necessary when using a nail gun.
Selection of brad nailers.
The brads should be inserted as close as possible in the same plane as the door glass in order to avoid hitting the glass when inserting the brad, as shown in Figure 23.
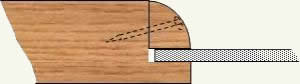
Figure 23 - Cross section of completed kitchen cabinet glass door
Brads should be placed about every 4″ to 6″ along the length of the molding, starting at about 2″ from each end. Recess the head of the brad to allow for a layer of wood filler. Once the wood filler is dry, sand it flush with the molding and put some of the chosen finish on the wood filler.
A cross section of the finished cabinet doorframe with the glass installed should be similar to Figure 23.