
Lead Based Paint Abatement Techniques:
- Enclose:
- Encapsulate:
- Replace:
- Removal
- Wet the surface with a paint removal solvent and/or an abrasive compound and using a wire brush and/or a hand scraper remove the lead based paint. It is important to follow the manufacturer's instructions and safety procedures when using any chemical product and it is no less important when removing lead based paint. If you are working outdoors cover any areas, that are not involved in the abatement, including lawns, and flower beds that are likely to get hit with lead paint debris.
- Although you should never attempt to remove lead based paint by dry hand sanding, you can use a wet sanding technique with either a manual sander (Figure 11) or with a power sander (Figure 12) that are equipped with vacuum ports so that it can be connected to the HEPA vacuum (Figure 10). Use a mist of water over the surfaces to be sanded to keep any flakes and/or sanding dust from floating in the air.
- A heat gun (Figure 13) is another technique that can be used to strip lead based paint. The heat gun melts the paint and it then has to be removed using a paint scraper. The problems associated with the use of a heat gun are; they encourage the release of lead particles and vapor from the painted surfaces and as well they can cause a fire on the wood if it is very dry.
One way to handle lead based paint is to bury it behind another material, creating a new surface. Walls and ceilings can be covered with a thin sheet of drywall, taped and painted. Problems with siding, trim and molding on the exterior of the home can be dealt with by covering them with aluminum or vinyl. By covering the lead based paint you are not faced with the daunting tasks of removal and disposal.
The negative is that the lead based paint is still on your home and if you plan on selling you will have to declare the problem to potential new buyers. It also means that if the new covering material should be damaged that the lead based paint would again be exposed.
Specialty formulated paints have been developed to bond with lead based paints and provide a very durable surface that prevents the lead based paint from flaking or powdering. The products are not inexpensive and it is critical that you follow the manufacturer's instructions explicitly.
Some items within your home that are covered with lead based paint cannot be new or they would not have lead based paint as the finish! In the case of windows and doors that are at least 35 years old you might want to consider installing new units. New windows and doors will definitely be more energy efficient and provide better overall home comfort. It is generally easier to install new products than it is to undertake an abatement project, however it will be more expensive.
Lead based paint can be removed in three manners:
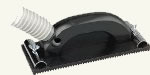
Figure 11 - Hand sander w/ vacuum port
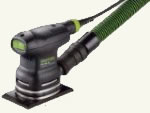
Figure 12 - Power sander w/ vacuum port
Always use a heat gun that has a setting of 1,000°F or less and always use an approved respirator (Figure 8) when using a heat gun on lead based paints.
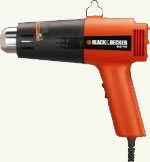
Figure 13 - Heat gun
Many Municipalities, Counties and States have enacted specific legislation with respect to the proper removal of lead based paints. However, with or without legislation there are certain methods and technologies that should never be used for lead based paint abatement.
- Never use a torch or other device that has an open flame to burn off lead based paint
- Never use a power grinder or sander without a HEPA filter or vacuum attached to a properly designed and fitted port on the device.
- Sand blasting, which is commonly used to remove paint from concrete and other masonry should never be used when lead based paints are involved.
- A common method to remove paint from decks and siding is to use a pressure washer. Unless you can ensure that the waste water is trapped and does not end up in gardens, lawns and the sewer system, pressure washers should not be used when lead based paints are being removed.