
Drywall Fasteners
Joint Tape and Compound
Drywall Calculator
Nail Pops In Drywall
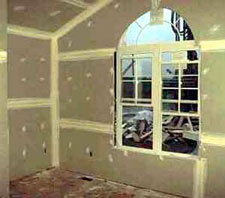
Figure 1 - Drywall taped
Drywall, a wall or ceiling finishing material, has a core of gypsum (plaster) sandwiched between layers of heavy paper, a finished surface and a rough surface. Drywall gets its name, as an alternative to plaster that is wet when applied. Known by a few terms and trade names, gypsum board, wallboard and Sheetrock (which is a trade name), drywall has become the standard finishing product for new home construction, as it is far less labor intensive and does not require skilled labor compared to lathe and plaster finishing.
Sheets of drywall usually have the long edges tapered in order to allow for taping and finishing the seams with drywall joint compound. The ends of drywall panels are not tapered and it is possible to purchase drywall having all the edges flat rather than tapered.
Drywall panels are available in four thicknesses; 1/4", 3/8", 1/2" and 5/8". Standard sheets of drywall are 4’ wide and 8’, 10’ and 12’ long, but they are also available in 6’, 7’ and 16’ lengths. You will pay a high premium for non-standard lengths. Although the most common drywall sheets are 1/2" thick, check with your local building department to verify the requirements in your neighborhood. If you are applying drywall to a finished surface, as a new surface finish you can use 1/4" or 3/8", however if it is the only material on the wall or ceiling you should use a minimum of 1/2" if you have 16" centers on your studs or ceiling beams and 5/8" if you have centers that are farther apart than 16". If you are wrapping a curved wall, you can use multi-layers of 1/4" or 3/8". In order to wrap a curved wall, nail one end of the drywall in place. Use a water sprayer and moisten the sheet of drywall, slowly force the drywall to take the shape nailing or screwing as you go. Nails and screws, must not break the paper surface. Double screw or nail on the edges. When you have completed the first layer, you can add a second layer to create a minimum thickness of 1/2".
Additional information on applying drywall to a curved surface.
Besides standard drywall, there are two specialty drywall sheets made for specific applications;
- Type X – drywall has a superior fire rating and is commonly used between a home and an attached garage or between multi-family dwellings Some building codes require an inch of drywall on both sides of the walls for those same situations. Again, check with your local building department.
- Type MR – drywall is moisture resistant (not waterproof). This type of drywall is commonly called green or blue board because of the color of the paper used. Moisture resistant drywall is generally used in areas within the home that are subject to high humidity such as bathrooms and laundry rooms. It comes in the same standard sizes in length, width and thickness as regular drywall.
Drywall fasteners: Drywall can be installed with nails, screws and panel adhesive or a combination of all three. There are advantages and disadvantages to each fastening method.
Nails for drywall are generally blue in color and have barbed or ringed shanks with a large head that helps it from piercing the paper. Nails have a tendency to pop back through the finished surface. To try to prevent this from happening it is wise to put a second nail 2" from the first. Nails can only be used if you are mounting the drywall to wood and should be spaced 6" to 8" apart.
Nail sizes: 1/2" thick drywall = 1 1/4", 5/8" thick drywall = 1 3/8". You will need a pound of nails for 200 sq. ft. of drywall
Screws for drywall are easier to install than nails, provide superior holding and will not pop back through the finished surface. If you are attaching drywall to metal studs you must use screws. A specially designed electric drywall screw gun will set the screws to a perfect depth. As an alternative you can use a drywall screw attachment with an electric drill. Although screws are more expensive than nails you do not need as many. Spacing of screws in wood or metal backing can be 12" to 16" apart and you can use 1 1/4" screws for any thickness of drywall. You will need a pound of screws for 400 sq. ft. of drywall.
Panel adhesive provides an excellent method of bonding drywall to old drywall, plaster or panelling. If you are using it on a ceiling I recommend reinforcing the mounting with some nails and/or screws. You will need a tube of adhesive for every 100 sq. ft. of drywall.
Joint Tape and Compound
Taping and applying the joint compound is what makes sets the amateur apart from the professional. It is the taping of the finished drywall that creates the smooth, seamless finish that can be painted or wallpapered.
For any project of reasonable size you will want to use paper tape. A fiberglass mesh tape is also available, but as a general statement it is only used for small or patch type projects. If you do not have a lot of experience with taping it is best to wet the paper tape before you embed it in the first coat and then apply some additional compound over it, squeezing the compound out from under the tape with a 4" blade. If you are working in corners remember to squeeze the compound out towards the outside edge of the tape not towards the 90 degree inner angle as you will get lumps of compound under the tape.
It usually takes three coats of compound to properly finish a joint with sanding after each coat. Use a wider blade with each coat, the final coat should be feathered out at least 12" from the seam. Although professionals will use a 12" trowel to apply the joint compound on each coat an amateur should consider using three different size knives, 4", 6" or 8" and a 12". I also recommend that the amateur use a corner knife for all 90 degree joints.
You will use approximately 35’ of tape for each 100 sq. ft. of drywall.
Joint compound can be purchased pre-mixed or in a powder that is mixed with water. Even the pre-mixed product must be mixed prior to use. Use a heavy duty electric drill with a paddle and ensure that you get to the bottom of the container.