
Staircase Terminology
Staircase Repair
How to construct a staircase.
Stair treads take a great deal of abuse and because of this it is not uncommon to damage stair treads or have stair treads develop a crack along its length.
It somewhat difficult to give a set of definitive instructions on how to replace stair treads as their are hundreds of different scenarios with respect to newels, balusters and trim moldings. The complexity is also aggravated by the inherent fact that staircases are not designed to be taken apart. The higher the quality of the staircase the more difficult it is to repair stair treads. A well made staircase has all connecting materials glued into position, with any mechanical fasteners hidden.
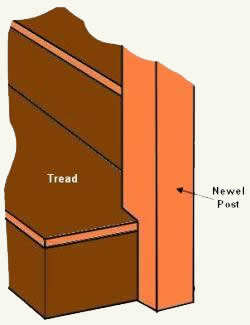
Figure 1 - Stair tread joined to a newel post
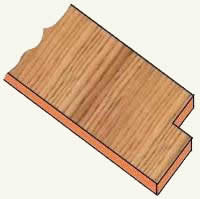
Figure 2 - Notched stair tread
Following are some illustrations and methods that can be used to replace stair treads. Survey your staircase and the stair treads and then determine which of the methods may be of use to you.
A newel post can sit on a stair tread or be beside it, as shown in Figure 1. From a picture or drawing it is almost impossible to determine whether the newel post actually sits on the stair tread or if the stair tread was notched to butt up against the newel post.
If the stair tread has been notched, as shown in Figure 2, you should be able to remove it without having to disassemble the newel post, if it rests underneath the newel post then the newel post has to be removed in order to replace the stair tread.
Newel posts can be anchored in a variety of different ways, mostly dependent on the design of the newel post. Many are mounted from the inside of the stringer, making it almost impossible to remove it, without access to the underside of the staircase.
A similar situation applies to balusters. They may be mounted using dowels through the stair treads and up into the baluster. They may be dovetailed into position with a piece of wood covering the edge of the stair treads, hiding the dovetail. The stair treads may be mortised into position (a square hole has been put in the stair treads to accept the base of the baluster),
Whatever the situation, you will have to find a method of removing the baluster in order to gain access to the stair treads.
Remove any decorative moldings from around the stair treads and the stringer or below the nosing of the stair treads on the side wall of the stringer. Also remove any moldings between the tread and the riser.
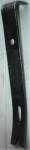
Figure 3 - Mini prybar
The best tool for removing the moldings and eventually the stair treads is a 7 inch mini pry bar, as shown in Figure 3. Always use a small block of wood under the pry bar to avoid damaging other staircase members. The riser should be behind the stair treads so it should not impede the release of the stair tread.
Using the pry bar pry upward between the stair tread and the riser in front of the stair tread. Work the entire front of the stair tread from the edge of one stringer across to the other, lifting in a maximum of 1/8 inch increments as you go along the front of the stair tread.
However, it is possible that the riser has been screwed horizontally into the stair tread on the back side of the tread on the underside of the staircase and/or that triangular blocks have been mounted between the stair treads and the stair risers, as shown in Figure 4.
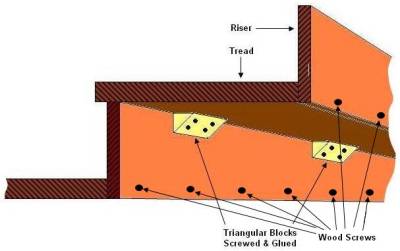
Figure 4 - Stair treads fastened with triangular blocks from underneath
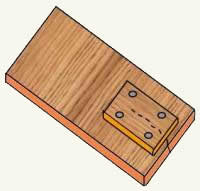
Figure 5 - Split stair tread
If you have these types of fastenings on your staircase it is almost impossible to remove the stair treads without access to the underside of the staircase.
A split stair tread does not necessarily have to be replaced, it can be repaired, providing the split is not in the nose area or over the edge of the riser.
Once the stair tread is removed you can add a piece of 1/2 inch plywood to the backside of the stair tread using screws and carpenters glue to bond and fasten the plywood to the tread.