
The next step is to complete the supports for the countertop in the base cabinet area as shown in Figure 33.
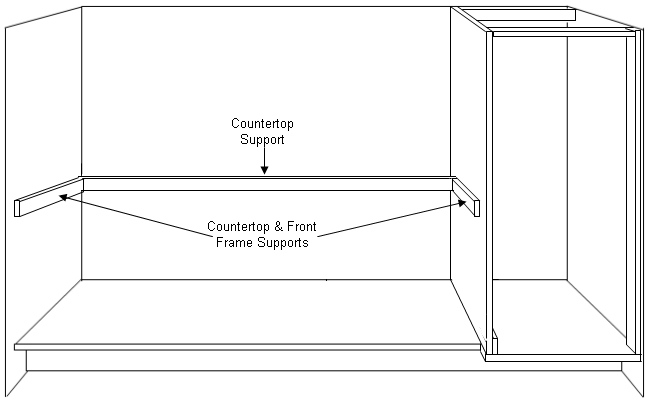
Figure 33 - Installing countertop supports for cabinets
Continue on with the base cabinet construction as described on Page 2 of the base cabinet construction section.
You now have a cabinet that basically goes from floor to ceiling. As previously described you can configure this cabinet in almost any configuration you can think of.
Some configurations will require face-frames, those that have doors and or drawers, other configurations will require a front panel so that items such as an oven can be inserted.
If your configuration requires a face-frame it should be constructed in the same manner as described on Page 4 of the base cabinet construction. Use dowels in the support members to attach the face-frame to the cabinet structure so that screws or nails are not visible.
Depending on the exact configuration, you may want to add additional support members. If we consider the configuration shown in Figure 25a, an oven mounted between to sets of cabinet doors, the internal structure should be built similar to that shown in Figure 34 below.
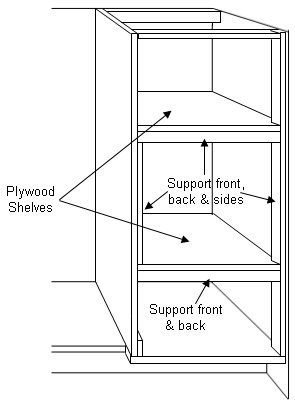
Figure 34 - Internal cabinet structure to mount a built-in oven
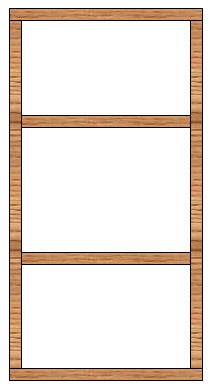
Figure 35 - Cabinet face-frame for a built-in oven
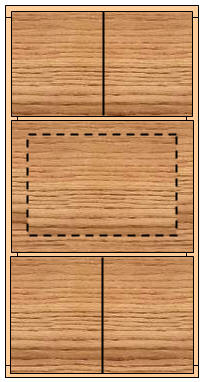
Figure 36 - Finished floor to ceiling cabinet for built-in oven
The floor to ceiling cabinet has been divided into 3 sections.
The top and bottom sections are for cupboards and the middle section is to house a built-in oven.(Check the weight, construction and mounting specifications of your oven before commencing to build the cabinet. Some built-in ovens require ventilation while others require a specific method of support.) Run all your electrical cables before commencing construction.
The face-frame for the floor to ceiling cabinet as shown above would look look similar to Figure 35 above.
Doors would be added to the upper and lower sections and a piece of sidewall would be mounted on the front to provide trim and framing for the built-in oven as shown in Figure 36 to the right.
Shelving can be added to any of the cupboard areas using brackets and standards that mount on the back of the wall or you can use side mount standards with clips.
Also see: