
Once the base cabinet support assembly is leveled and fastened tightly to the walls you can add the floor or top, Figure 3 and 3a.
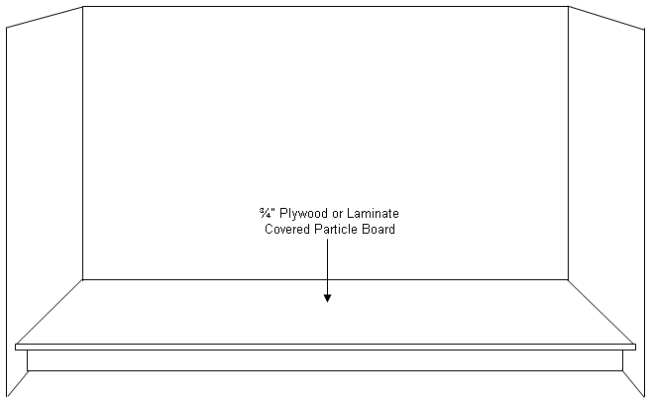
Figure 3 - Installing floor on base cabinets
Attach the top to the base assembly using 1 1/2″ finishing nails on the sides and back.
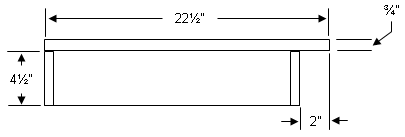
Figure 3a - Cabinet base floor extends forward to provide toe kick
Once the base assembly is complete you can add the countertop support rails, Figure 4. 1 X 3 or 1 X 4 construction grade lumber will suit this purpose. The height from the floor to the top of the rails should be 29 1/4″ Again, make sure that the rails are level and fasten to the wall using screws into the studs.
The height of the rail to the floor should be 34 1/2″.

Figure 4 - Installation of base cabinet support rails for countertop
The front edge of the rails must line up with the front edge of the cabinet base top, Figure 4a. It is important that the front pieces be plumb with each other as the front cabinet face will mount to the front edge of the rails and the front edge of the cabinet base.
The upper rails should have two 1/4″; holes drilled in each of the ends that face to the front. These holes will accept the dowel pins from the front frame section.
Additional information on using dowel pins for woodworking joinery.
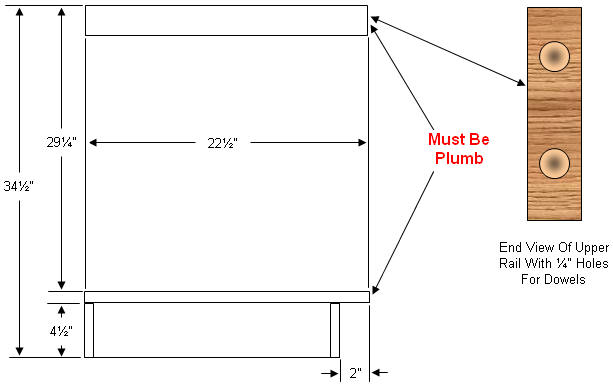
Figure 4a - Positioning of base cabinet support rails
Continued - Base Cabinets...
Also see: