I purchased the platform, laminate covered particle board, and laminate covered Masonite and the 1″ x 3″ pine at one of the big box building centers.
As you can see in Figures 2 and 3, I rounded the two outside corners of the platform using a large coffee can as the template and cut it with a saber saw. Once the platform was complete, we ordered the Christmas village pieces that we wanted and made cardboard templates of the base of each unit so that we could play with a layout.
Figure 5 shows the basic layout that we chose.
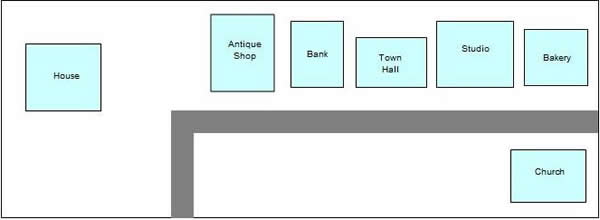
Figure 5 - Christmas village basic layout
We decided that we would design the village so that it appeared to be nestled in a canyon with a wall of rock at the back and left side. We would have one of the buildings raised.
I had never created a canyon or rock wall so I did some investigation and the answer seemed to be rolled up newspaper covered with plaster of paris. It is the method used to create mountains in scaled model railroads. I opted to be different; I have never been a conformist. I created the canyon wall and the raised area for one of the buildings from sheets of Styrofoam, which I also purchased at one of the big box home improvement stores.
Note: My wife and I quickly realized that the big box home improvement stores are much less expensive for supplies than the craft stores, if they have the materials that you need.
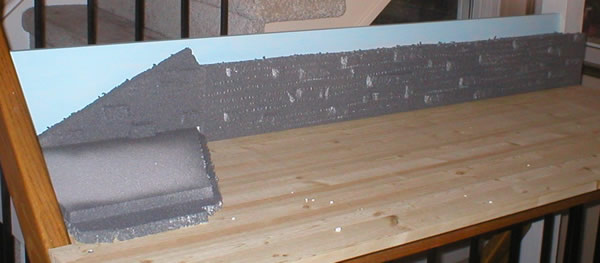
Figure 6 shows the Styrofoam rock formations in place before painting.
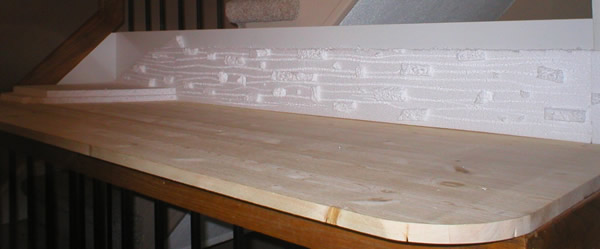
Figure 6 - Christmas village rock face prior to painting
I painted the visible portion of the white laminates with a light blue paint which I thinned out to allow the white to show through. The intent was to give an impression of sky in the background. I am not an artist!
I painted the visible portions of the Styrofoam with a grey spray paint that is meant to look like rock. I believe that the product is quite good and the finished appearance of the Styrofoam does look like a rock face.
Figure 7 shows the background painted with the blue paint and the rock face painted with the rock impression paint. The rock face looks much better in real life, for some reason there is a reflection off some of the surfaces when I took the picture. I am also not a photographer!