For our Christmas village we chose four store type buildings, a city hall, a church and a house. As the house didn’t seem to fit, if we just placed it on the street in row with the stores and city hall we opted to place the house on a small raised deck at one end of the platform, as you can see in Figure 7.
I wanted to have steps from the ground level going up to the raised deck where the house would be located. We checked out all of the craft stores and couldn’t find a set of stairs that would match the scale of the Christmas village buildings. I really didn’t want to go through the exercise of building stairs from small pieces of wood so after some thought I decided to try our local model train store.
Of course, the Christmas village that we chose has a scale somewhere between HO
and O
scale model railroad. I found a HO
scale staircase with railings that seemed to suit, but had to buy two sets in order to reach the height of the base of the house that I wanted. The staircase even comes with the railings as you can see in the completed picture, Figure 16, but you have to put it together and because I wanted an L
staircase, the railings weren’t designed to be used in that manner. With a razor blade knife and some plastic cement I made the modifications.
Model train stores have a phenomenal amount of village type accessories that can be used in any type of Christmas village scene. We also purchased a set of dogs and cats which included a garbage can and fire hydrant; a set of 35 snow covered pine trees of different sizes; some deer and elk and two sheets of vinyl, self adhesive cobblestone road. I also purchased the street and house lamppost lights for the Christmas village from the model train store. The dogs, cats, deer and elk were marked as O
scale and the trees, street and house lamppost lights and the cobblestone road were marked as HO
scale.
I preferred the snow covered pine trees from the model railroad accessories over the ones that were sold in the craft stores because the ones in the craft stores have bases that allow the trees to stand-up. The problem is that the bases, in my opinion, look out of place. They look as if they are not growing out of the ground. The snow covered pine trees from the railroad store only have a trunk
on the bottom. In order to mount them on the platform I drilled a hole in the wood and then stood them in the hole. If they were being placed in the Styrofoam I just pushed them, with a small twisting motion into the Styrofoam.
Note: The products sold in model train stores are not inexpensive!
Once I had the staircases I could determine the exact height of the raised deck for the house. I build the raised deck out of some more Styrofoam, which, I found out later, was a small mistake! At this point of building the Christmas village, I hadn’t given much thought to how I would mount the lamppost lights. When it came time to mount the street and house lamppost lights I decided that I would drill a small hole and feed the wires through the hole to the wiring area below the platform. However, what I didn’t realize is that it is very difficult to drill a small diameter hole in Styrofoam, as the hole closes after you remove the drill bit.
Next time around, if I have a raised portion I will build it out of some sort of suitable wood material; plywood, pine lumber, or particle board!
Back to the layout of the Christmas village.
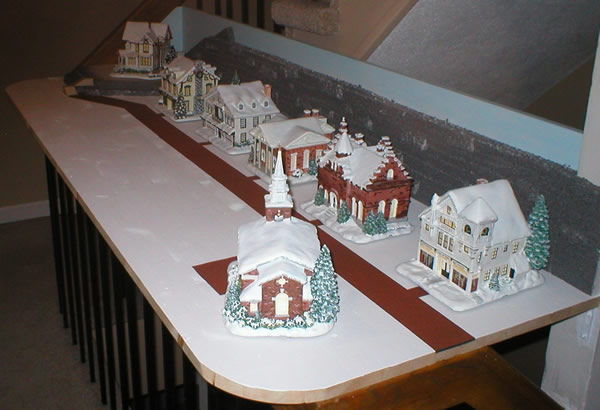
The next step was to actually place the Christmas village stores, church, city hall and house in position. We placed the actual buildings in position on the platform and moved them around, until my wife was happy! This also gave me the positioning for the raised area for the house. We also placed the cobblestone road in position.
Figures 8 through 11 show the positioning of the buildings and the cobblestone road. I also placed the staircases in position although as you can see they are not glued together nor are the railings attached.

Figure 8 - Christmas village rock face and background painted
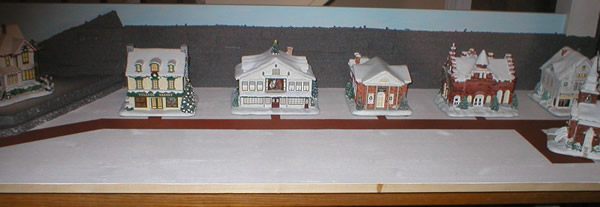
Figure 9 - Christmas village buildings positioned from front
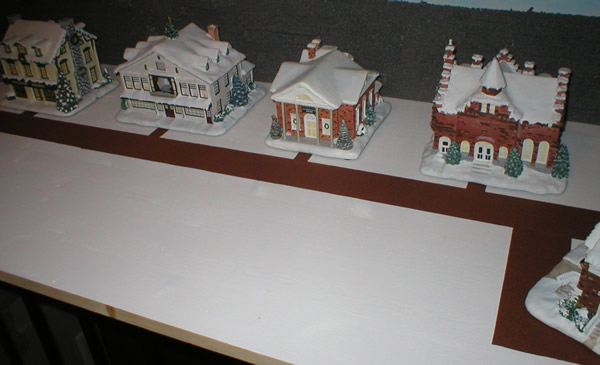
Figure 10 - Christmas village buildings positioned from front right