A note about the self adhesive vinyl cobblestones. The vinyl was very unforgiving; if you placed it down and wanted to correct its position it wouldn’t move!
I then placed a layer of simulated snow material that I purchased at the craft store over the entire platform. My original concept was to trim the snow around the cobblestone road. However, after I placed the snow into position I decided to leave it covering the cobblestone road for two reasons. I actually liked the appearance of the snow covering the simulated cobblestones and second, the simulated snow material is very difficult to cut, even with a razor blade knife and I was also concerned that the snow would not lay flat against the vinyl.
I had completed the Styrofoam raised deck and its matching back and had painted it with the stone appearance paint on the edges and back. I then covered the base of the raised deck with a piece of the simulated snow.
I placed the back rock wall and the raised deck into position on the platform. Then I put the buildings back into their positions. Things finally appeared to be coming together and the painted Styrofoam, cobblestone road and the seven buildings finally began to look like a Christmas village.
My wife placed the street and house lamppost lights and the snow covered pine trees into position. The pine trees on the top of the rock face were just pushed into the Styrofoam. However, the street lamppost lights, house lamppost lights and the trees that were to be located on the platform required that I drill holes for the wires for the lamppost lights and for the tree trunks so that they would stand-up.
I used a sharp HB pencil and made a mark through the simulated snow cover. I could not drill through the simulated snow cover as the fibers that it is made out of would have wrapped themselves around the drill bit and torn the simulated snow to shreds. That being said I removed the buildings – again; and pulled the simulated snow covering back in order to drill the holes in the pencil mark locations.
Of course, the sizes of the holes for each of the four different size trees had to be different. I picked a nominal size from one of the tree trunks for the holes for the street and house lamppost lights.
I also drilled the holes through the Styrofoam on the raised deck and as mentioned earlier realized that drilling small holes in Styrofoam is not easy.
Once I had all of the holes drilled, I decided to work on the raised deck and installed the house lamppost lights by running the wires through the holes that I had managed to create. My wife had decided to have four lamppost lights on the raised deck, two around the house and two by the steps. Using some very small wire nuts that I had left over from another project, I combined the wires for the house lamppost lights with a single two wire lead that I would be able to connect to the house and street light transformer
I then replaced the simulated snow covering and spent some time aligning all the holes for the lamppost lights and the trees. The simulated snow covering contracts and stretches as you pull on it, so aligning all of the holes without creating a lot of wrinkles, took some time.
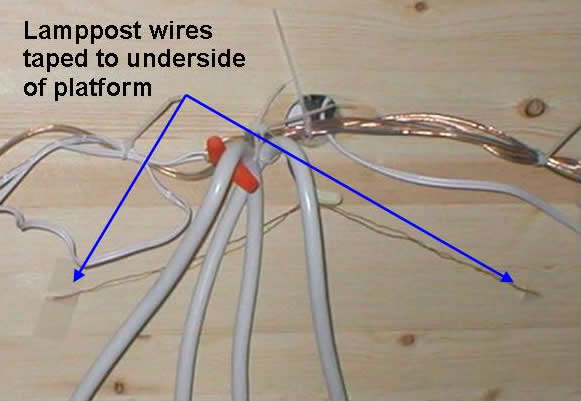
I placed the raised deck for the house in position and fed the wire for the lamppost lights down through the hole that I had made for the power cord. In order to make the lamppost lights stand-up perfectly straight I pulled on the wire and then taped it tight to the bottom of the Styrofoam. This worked exceptionally well and all four lamppost lights stood straight.
I then installed all of the street lamppost lights by feeding their wires through the appropriate holes in the simulated snow and wood platform. I then pulled the wires tight from each lamppost tight and taped the wires to the bottom of the platform, as shown in Figure 12, again all of the lamppost lights stood very straight.