The 4' X 8' sheets of V
groove wood paneling, with vertical grooves every 4 to 6 inches, available in a number of colors and wood grains, as shown in Figure 1, used to be one of the most popular wall coverings, especially for family rooms and basement renovations. It was relatively easy to install and any reasonably competent home handyman could install it with very few tools. V
groove wood paneling installed very quickly and provided a neat and clean finished look.
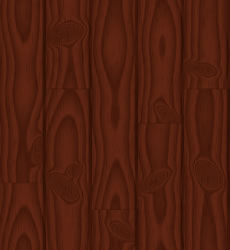
Figure 1 - Old style wood paneling with V
grooves
This style of grooved wood paneling is no longer considered to be fashionable. It is considered to be old and outdated.
If you have a room or group of rooms that has this old style wood paneling and would like to change the finished wall to something else with a painted or wallpapered finish, but are constrained by a budget, you do have some alternatives.
- You could place a layer of drywall or sheetrock over the paneling. This is not an inexpensive or easy exercise. There are numerous problems associated with hiding the paneling in this manner.
- One of the most common ceilings installed in conjunction with the old style wood paneling was a suspended ceiling, as shown in Figure 2.
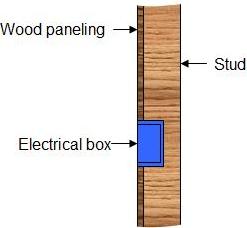
- The electrical boxes for outlets (receptacles) and switches would end up recessed in the wall. The front face of electrical boxes are meant to be flush with the finished outer wall surface, as shown in Figure 5.
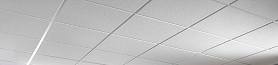
Figure 2 - suspended ceiling
The metal L
trim that holds the outside edges of the ceiling is usually nailed on top of the paneling, as shown in Figure 3.
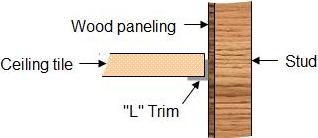
Figure 3 - L
trim mounted on top of wood paneling
Note: The second most common ceiling used with old style wood paneling was the 12″ square ceiling tiles which were stapled to furring strips. These types of ceilings are also out of date and if you are planning on covering the old wood paneling you may wish to consider adding a layer of drywall over the ceiling tiles to make the décor of that room up to date.
If you wish to leave the 12″ square ceiling tiles in place you may wish to add a molding where the ceiling meets the wood paneling after you have completed covering the wood paneling.
In order to properly install the drywall on top of the wood paneling you should take the edge ceiling panels out of the suspended ceiling grid, remove the L
trim, adjust the lengths of the L
trim and then replace it after completing the drywall. This would also entail trimming all the edge ceiling panels and cutting the ceiling tile support cross members that run to the perimeter of the room and rest on the L
trim.
Note: It is possible to install the drywall over the paneling without removing the ceiling by cutting the drywall to the height of the ceiling and butting it up against the L
trim. As a perfect fit between the drywall and the ceiling is almost impossible, if you chose this method you would most certainly have to add a ceiling molding to hide the joint between the drywall and the L
trim, as shown in Figure 4.
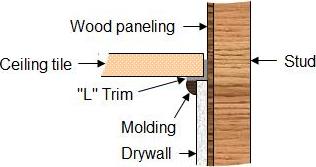
Figure 4 - Ceiling molding installed to hide top edge of drywall