
Along with the side supports for the finishing material such as drywall, back bumpers, as shown in Figure 7, or stops are installed to give the sliding pocket doors something to gently
hit when opened.

Figure 7 - Pocket door - door stop

Figure 8 - Pocket door glides
The pocket door travels along a set of guide strips (Figure 8). The guide strips keep the doors vertical and prevents them from swinging.
The basic rough-in structure for pocket door is shown in Figure 9.
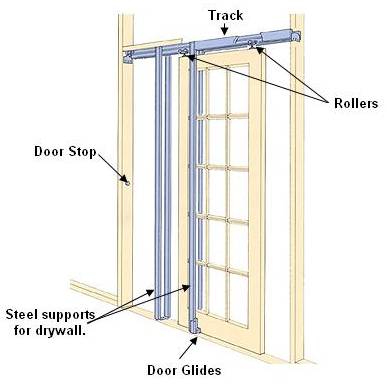
Figure 9 - Pocket door track and drywall support installation
If it is not a supporting wall the rough-in framing for the pocket door can be done in the manner shown in Figure 10, I however am a firm believer in using a proper header. A proper header ensures that the framing will not twist or bow in any manner and once installed the pocket door will not shift position.
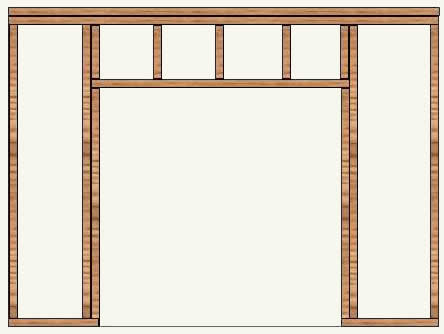
Figure 10 - Rough-in framing for a pocket door in a non-supporting wall
Although square, level and plumb is important when doing any construction project, it is critical when installing pocket doors. If the rough-in framing is not square, level and plumb the pocket door will not hang properly and hence will not close in the proper manner.
It is equally critical that the rough-in construction is well built, as lumber that may twist or bend over time will cause the pocket door to stick and/or not close flush with the door jam.
If the wall where you are installing the pocket door is a supporting wall or if you are like me and prefer to do a superior job then Figure 11 is my recommendation for rough-in framing:
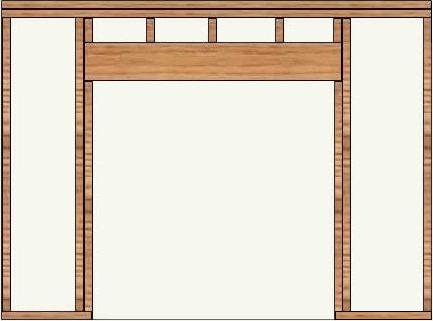
Figure 11 - Rough-in framing for a pocket door in a supporting wall
The 2 X 8 header provides a very solid structure to mount the pocket door track to.
Figure 11a shows a wood style pocket door frame and the pocket door installed in the rough-in that was shown in Figure 11.
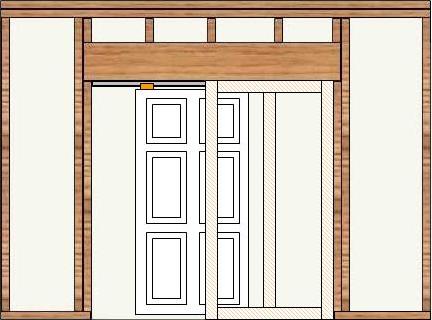
Figure 11a - Rough-in framing with pocket door framing and pocket door installed
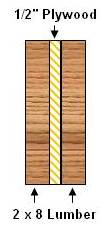
Figure 12 - Construction of the 2 X 8 header for a pocket door
The header should be constructed out of 2 X 8 lumber with a plywood filler, as shown in Figure 12.
Note: Measure the thickness of the 2 X lumber that you are using. Depending on the mill and when the material was milled, the width of a 2 X 4 can vary from 3 1/2 to 3 3/4 inches. Adjust the width of the header by using an appropriate thickness of plywood.
There is also a variety of hardware that can be used to finish your project. Pocket doors can even be equipped with key locks (Figure 13) or you can choose from an array of antique hardware (Figure 14). All the common finishes are available to match and enhance your decor.
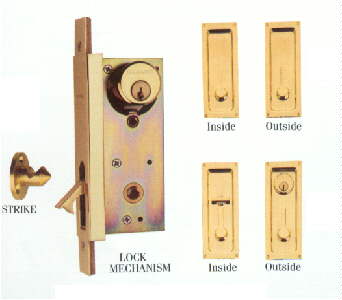
Figure 13 - Pocket door - keyed door lock
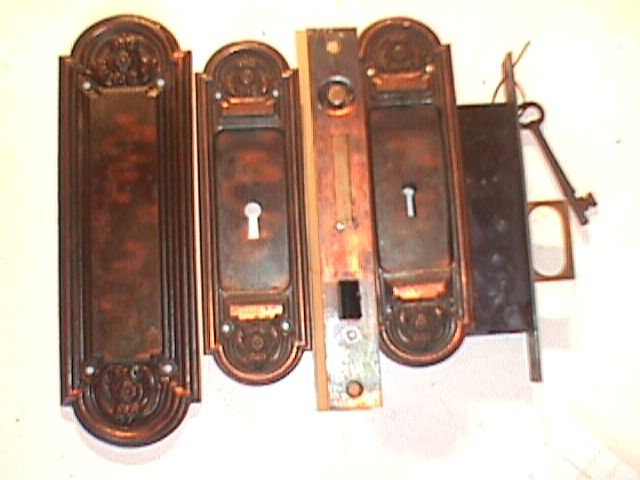
Figure 14 - Pocket door antique hardware
Selection of pocket door hardware