
The installation or hanging of drywall, also known as gypsum-board and sheetrock, as shown in Figure 1, although not difficult, requires lots of muscle and tender care. The muscle is needed because drywall panels are heavy. A 1/2 inch thick panel weighs about 2 pounds per square foot, making a 4' × 8' panel 64 pounds.
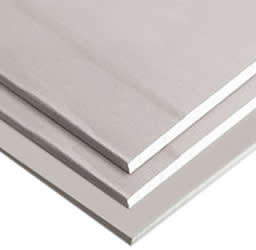
Figure 1 - Drywall panels
The care is needed because the seams must be invisible
. For both these reasons make sure to have at least one or two other people on hand while installing the drywall, together with ample time to spend on your joint work.
The installation of the drywall starts with the ceiling panels both because it’s harder to install the ceiling than the walls, and because sloppy connections between the ceiling panels and the wall framing can be corrected while installing the wall panels. Of course, this does not mean leaving a 2 inch gap between the ceiling panels and the walls, as shown in Figures 2a and 2b.
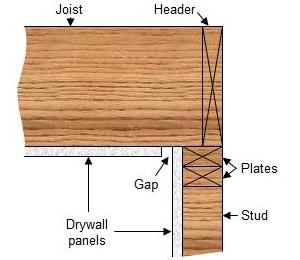
Figure 2a - Incorrect drywall panel positioning
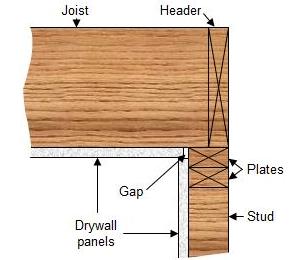
Figure 2b - Correct drywall panel positioning
Note: Drywall lift machines, as shown in Figure 3, are now available that make the installation of drywall on ceilings and walls much easier. These drywall lifts may be purchased, or rented from most of the major tool rental facilities.
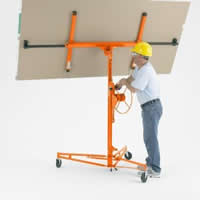
Figure 3 - Drywall lift
Start by checking to see that the corner of the ceiling where you plan to begin is square. If it’s out of square, take measurements between the center of the joists, where one edge of the panel is to be screwed, and the top plate to find the angle at which the panel should be cut. Transfer these dimensions to the panel and cut it to fit the corner.
Note: The best way to cut drywall is to mark the panel where it must be cut and place a straightedge on the mark. With a utility knife, score the surface paper trying to press hard enough to cut into the drywall core. Be careful to cut slowly; a quick cut could get out of control and you’ll wind up slicing your hand instead of the panel. Bend the board backwards, away from the cut, as shown in Figure 4, until you break the core. Slice the back paper with a knife and smooth any edges that may be rough.
Note: To continue to get smooth cuts, change the blades in the utility knife often!
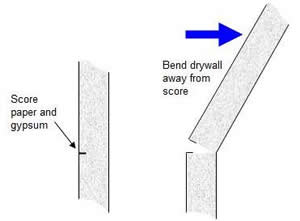
Figure 4 - Cutting drywall
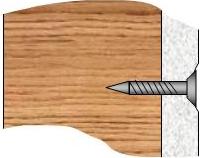
Figure 5a - Proper insertion of drywall screw

Figure 5b - Improper insertion of drywall screw
With the panel cut, you’re ready to lift it into place. Butt the panel against the wall. As one person holds one side, (or using a drywall lift), screw the other side to the underside of the joists every 6 inches. Remember that all joints must be centered over wood. Set the screws a little below the surface of the panel. The idea is to be able to cover the indentation with drywall joint compound, in order to obtain a smooth surface. Projecting screw heads will otherwise stick out on the surface as shown in Figure 5a and 5b. The remainder of the ceiling panels are installed similarly, making sure the edges butt against each other.
Note: Butt joints at the ceiling are very difficult to finish. One way of avoiding them is to use sheets of gypsum board that are as long as the room is wide. You will, of course, have to enlist some extra help to handle the larger sheets, but it may be well worth it.
Once the ceiling is complete, the wall panels are erected. Any small inaccuracies that have been left at the edges of the ceiling panels can now be covered. Begin the installation at one corner. The first step is to ensure that the corner is plumb. Cut the panel to match the corner where necessary.
Drywall may be installed either vertically or horizontally. Because the joint work is difficult, it is wise to apply the panels in whichever manner will result in the fewest joints. Horizontal applications usually result in fewer seams.
Additional information on avoiding vertical joints at the top of doors and the top or bottom of windows.
For horizontal applications, start by installing the top panel. Butt the panel up against the ceiling and screw it every 6 inches, as shown in Figure 6. The lower drywall panel is then cut to fit the floor. Any gaps or inaccuracies left between the panels and the sub-floor are covered by the baseboard.
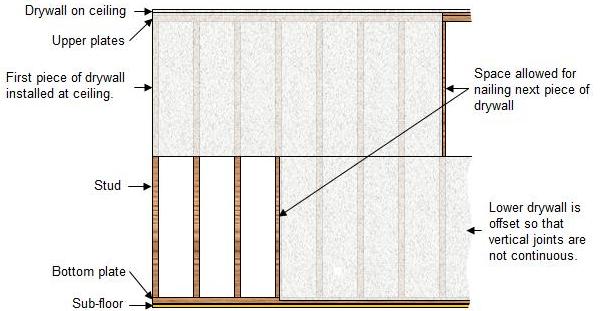
Figure 6 - Horizontal drywall installation
For vertical installations, check the corner for plumb and cut the panel as needed. Butt the panel well against the corner and screw it in place, as shown in Figure 7.
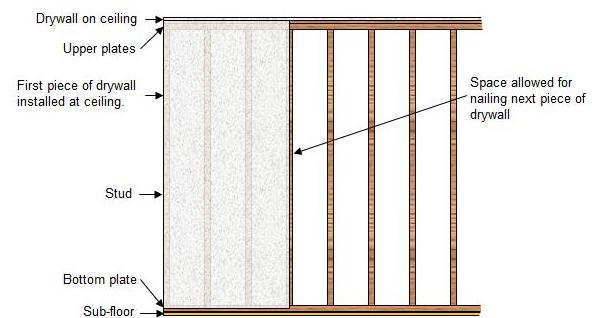
Figure 7 - Vertical drywall installation
Openings must be provided in the panels to allow for outlets, switches, pipes, etc. Determine the exact location of the opening and mark it on the face of the panel. Poke holes at the corners of the projected opening with a knife and with the aid of a drywall saw, as shown in Figure 8, cut out the remainder.
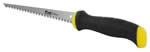
Figure 8 - Drywall saw
Note: If you have an abundance of electrical boxes or other areas that must be cut out of the drywall you may wish to consider using an electric high speed rotary tool.